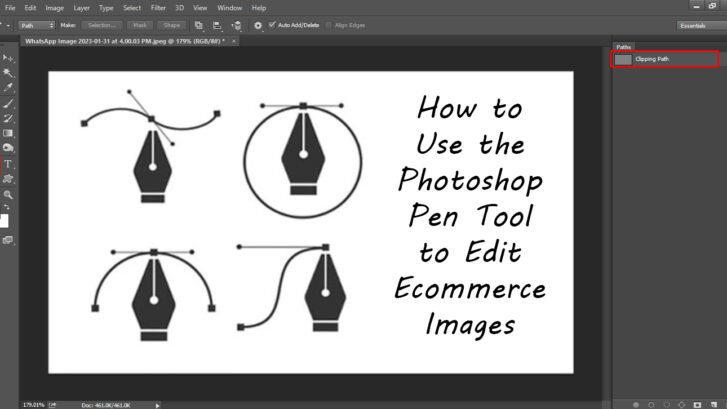
E-commerce has become one of the fastest-growing and biggest industries of this century. In this sector, Adobe Photoshop is the software that can help these industries to a larger extent. Photoshop is truly powerful and versatile photo editing software that can deal with making easy clipping paths faster. In this article, we will discuss how to use the Photoshop Pen Tool to edit ecommerce images that will help you boost your image editing firm in the long run. How to Use the Photoshop Pen Tool to Edit Ecommerce Images. Lets go
What is Adobe Photoshop’s, Pen Tool?
A Photoshop Pen Tool is an essential tool used widely for generating shapes and path formats. A pen tool is considered for its high quality and precision-based outlining, making Photoshop an indispensable design tool.
A Pen Tool has better utility than a brush and pencil tool. Not like drawing pixels, a pen tool is used in creating a vector-design tool when the path is used.
Photoshop Pen Tool
To start, you need to activate the Pen tool first. Open Adobe Photoshop and click the ‘P’ key on the keyboard if you want fast access. The pen tool will be activated to work.
You can find the tool from the Main Tool palette on the left side of your display. You can get it quickly above the Text tool. Clicking on the tool will show you five other features. And under the Text tool, you will find the Direct Selection Tool and Path Selection Tool.
Now, it is time to start cropping.
How to Design New or Existing Paths Using the Pen Tool?

Whatever Photoshop version you are using, these are the basic variant that you will be able to see in every version; thus, let us start from this.
- Regular Pen Tool
- Curvature Pen Tool
- Freeform Pen Tool
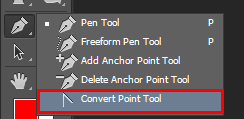
If you are working on existing paths, then the remaining option, for example, delete the anchor point tool, add the anchor point tool and convert point tools are going to arise in front of you.
When you are generating a new path, we recommend looking up the settings of the Pen Tool by looking up either the shape or the path in the options tab that you will find on the application bar.
Consequently, when you are using the Pen Tool, this will open up a new work interface and also come out in the Layers and Paths Panel. When you are changing the settings, we can even alter various properties of the tool, for instance, pixel size, fill color points, lengths, thickness, and even width. You will be able to customize them in all the individual layer paths that you can create.
After that, when you select a Path to take, you will be capable of finding an option that will make you an initial path and also generate it to be a selection. You will be able to find it in the option called Combine Shapes.
One of the Pen Tools’ most significant roles is the path structure’s design, which also proceeds to the role of the Paths Panel. You will be capable of seeing the Panel as it is always available in any interface that works. Also, you will be able to locate them on the Paths tab that is situated over the Layers Panel. On the other hand, you can also click on the Windows tab, and then a drop-down box will open up, where you can see various options.
How to Use the Photoshop Pen Tool to Edit E-Commerce Images
Right now, we are going to talk about how to use Photoshop pen tool so that you can edit different images, including the eCommerce images. However, with this tool’s help, you can make and design straight or curved paths without any more bother. If you follow the guide below, then you will be able to get the hang of it even faster.

Create a new path
At first, we require to start from a point, which must be at the border of a vertical line. It will aid you to make the first path go down, which is easier because giving horizontal lines at the start might cause trouble for many people since their hands might get shaky. After that, you should click on the other edge of the subject with the aid of the Pen Tool, and you will be capable of seeing a vertical line on your image. You will then be able to see a work path panel that emerges on your screen when you click on the point to make another path.
Curved Tool
Create a curved path segment
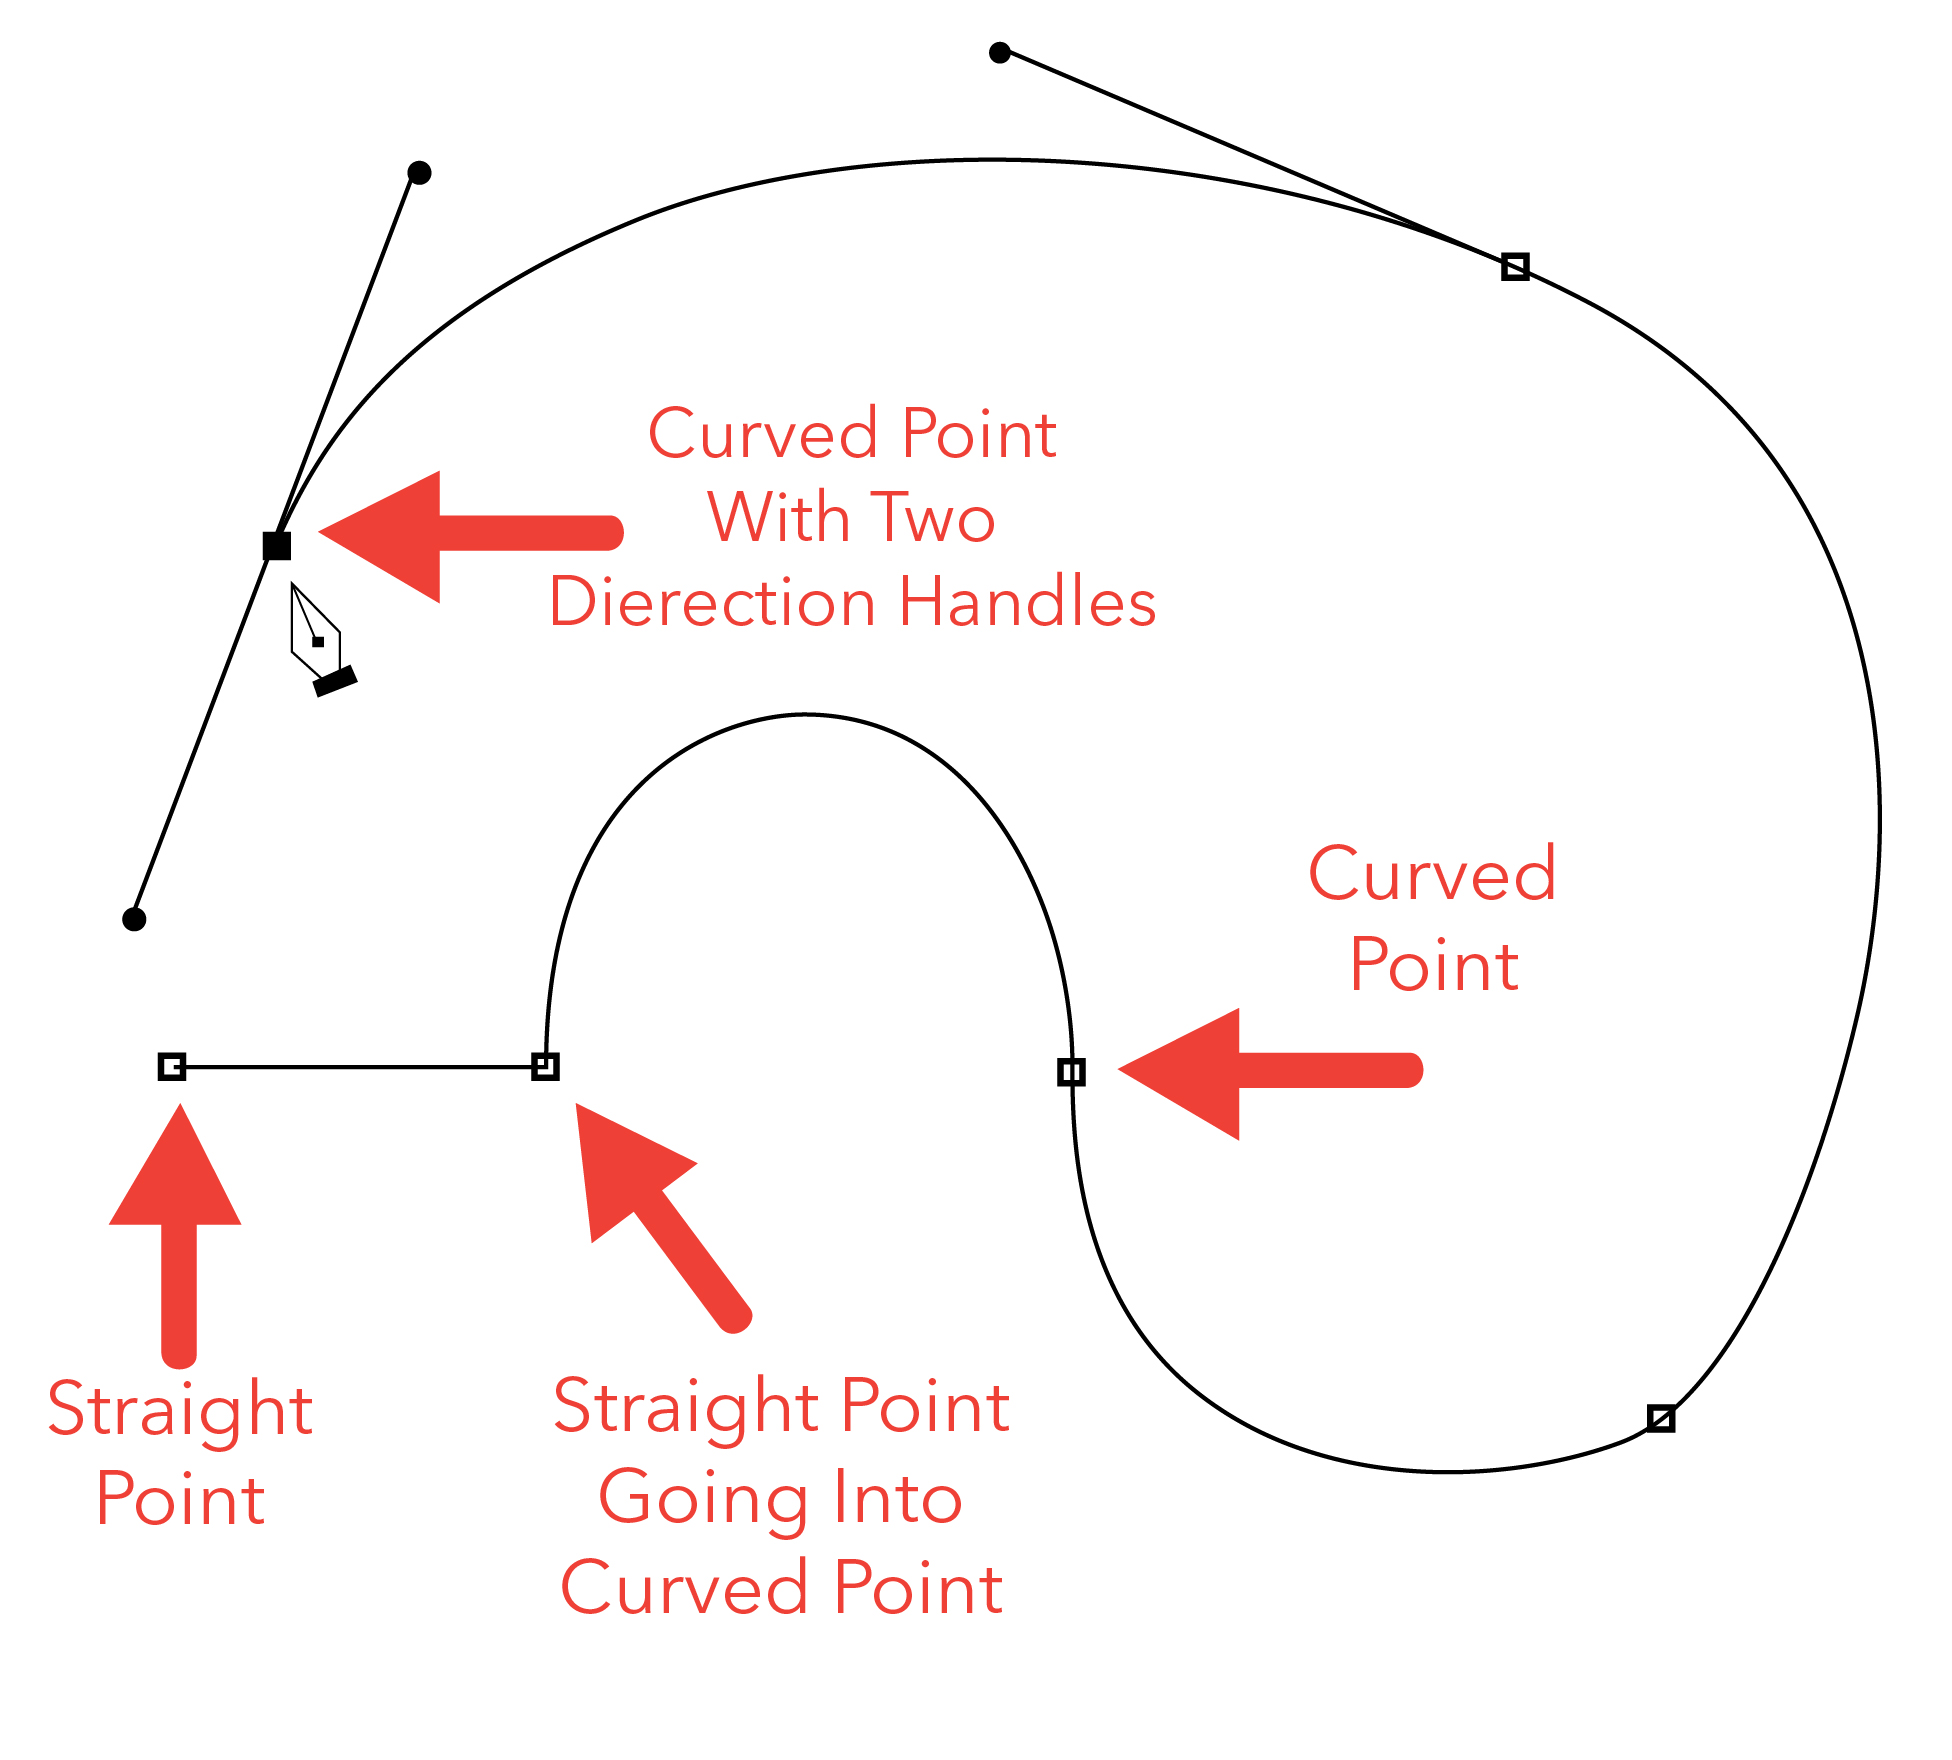
To make a curved path, you need to make a straight path like the earlier one; however, you need to keep pressing the final point plus drag the mouse to either side. You can see that there has been a curve on your display.
It is furthermore named Handles, which look like a tangential line. You will be capable of dragging the mouse until you get your requisite curve or the shape that you want to get. Please do remember that the handles must be formed with the curved lines appearing previous to plus following the tangential point. Thus, the section of the forthcoming path needs to be drawn afterward, making a curved line.
It will keep up with the path of the handle from the final plotted point plus give you a smooth curve that will help you get out of the points. While you click on the next point, you could make new handles just by dragging the mouse plus adjusting the curvature that appears alongside the new point.
Creating a straight path segment after a curved path segment
If you are trying to make a straight path afterward a curved path, then you can do that by first making the curvature through the pen, and then clicking on the next corner point with a mouse, while holding the ALT key. This will confirm you that another handle is disappearing. After you are done with your desired path, then as a user, you are required to trigger the first point of contact after going through the path all the way around.
While you click on the first circle back afterward going around, you will be capable of bringing in the curtains to the overall path of the image. When you are done with the final image, it is mandatory to save the path so that it will not be deleted. If you want to do so, you need to click on the Work Path in the Panel and then save it with an assigned name.
Change the created path.
If you want to change the created path by using the Pen Tool, then you can do that in the modification panel. The modification tool and modification panel are a perennial procedures in any design. If you want to do that, you will be able to do that by opening the Photoshop Paths Panel and then choose the saved file.
When you are talking about generating new paths over an on-hand path, you first need to update and do the path design over the path that you have already done. To do that, you first need to select the path and then select Pen Tool.
After that, you should go to the Options bar and click on the Exclude overlapping Shapes option. Once you have selected it, then the existing path will gradually become visible. You should start drawing on the areas that you do not want to do or do not want to include in your design. Once we have chosen our path, the area with the latest path will be removed.
After you modify the on-hand point or handle over the given path, you have to select the Photoshop path selection tool from the menu. After that, you need to choose the Direct Selection Tool, and this will provide you with all the disclosures in the form of a white box that includes the handle points. With this tool, it is possible to move along existing points plus the curves over the image.
Convert Point Tool and How it Works
Convert Point Tool is the last tool in the list and can usually be accessed as any other previous Pen Tool variants. With the aid of this tool, it is also possible to control the handles over the existing points in a similar means to the process through the Direct Selection Tool.
However, the difference sees the Convert Tool does not facilitate moving along with on-hand anchor points. This is mainly because the Direct Selection Tool does not work with the same process as the Convert Point Tool and as it changes straight lines into curves and vice-versa.
How to remove product photo from its Background
Once you are done with selecting the path, you have to remove a product from its background since that is your final target. For that, you need to separate the object layer from the Background. To do that, you first require creating a new layer mask, or you can even paste this layer over another. Though, do keep in mind that you need to be in the layer where you are supposed to work.
After that, you need to copy and paste the layer that you want to work on, and by pasting that, you could make a new layer similar to the one you copied. This new layer will have all the properties of the old layer, and you can then remove the original layer that would isolate the object from the Background. If you want to develop a fresh new layer mask, you can use the Layer Mask icon on both the Paths and Layers Panel, which is easily situated at the lower end of the panel box. This thing emerges like a black circle into a white-colored rectangle. If you click on the icon, that will make a Layer Mask automatically.
If you want to alter the shape or the size of the Mask, or even the scale of the picture you have masked, you could do that by using the Transform Path menu. You can do that by choosing the Shape Path that you want to change; after that, you have to click on the Edit menu on top of the menu button.
After that, you need to click on the Transform Path to select this action. You can even click on the CTRL + T on the windows device or the COMMAND + T in case you are using a Mac to get this option. You can do all different kinds of changing the shape plus size of the object. You will even be able to rotate the image as you like.
Uses of Different Types of Pen Tools
Curvature Pen Tool is helpful for diverse following up of uniform shapes, including an arch or even a circle. Once the path has been designed, the tool should be used widely with the tool that behaves like a routine and Standard Pen Tool.
Pen Tool has a comparatively more comfortable usage application with a stylus, and using the mouse with Pen Tool; you can design points with handle curves by drag and click option. Using a stylus, both creating points and handle curves are possible.
FAQ
What is the key objective of using Pen tool in Photoshop?
A pen tool is a standard tool used in Photoshop which aids in generating paths and shapes of various sizes to make selections that could later be used to develop and manipulate selections. The pen tool is the precise way to create a selection, better than the brush and pencil tool.
How does Pen work in Photoshop?
The Pen Tool in Photoshop generates paths and shapes which could be duplicated and manipulated to make complex mask selections and objects. Not like the Brush and Pencil Tools, which “draw” pixels onto your photo, the Pen Tool always generates a vector path when used.
Can we trace a logo using the Pen tool?
Tracing an object with the pen tool could be done with any symmetrical object.
How to curve image in Photoshop?
Click on the “Shape layers” image in the Options Bar. Then, if you move further to the right, you will get the Radius option. This option decides how rounded our corners would be. The higher the number, the more rounded they will be.
How to use the pen tool illustrator?
The Pen Tool has always been really helpful. And the pen tool illustrator is used to trace image/object outlines, make clipping masks, create logos, and design or edit vector graphics.
How to curve image in Photoshop?
With the Pen tool selected, click & drag to generate a curved line. You can also use the Convert Point tool to click & drag on the line to change its shape. Another way to generate a curved shape is to use the Ellipse tool. To make a perfect circle, hold down the Shift key whereas you click and drag.
How to make selection a path in Photoshop?
The path selection tool could be used to select a whole path or sub path. If you have a path that is detectable in a Photoshop document, marquee drag or click with the path selection tool to choose a path and this will make all the anchor points become active.
Final Thoughts
E-Commerce business is flourishing today, with Adobe Photoshop’s picture-perfect image editing options. It is a general understanding that big chunks of people are fussy about detailing and examining the images of a product. With Adobe Photoshop’s Pen Tool, editing and modification of a precise product image and change of Background and utilities are pulled off easily. With an understanding of the product, an individual can inspect and read about its utility. We are a reputed and proficient firm offering comprehensive image editing and related services. You can always get the best photo-editing assistance from a reputable company like Clipping Path Mania.