How to resize photos in Photoshop
Images can help make a website look more attractive to a viewer. Uneven sizes of pictures that refuse to load could deteriorate a web user’s experience. The wrong image size is generally the reason for these problems. Not resizing images might also become a hassle for you when you try to upload photos. Besides, not resizing your pictures can also take up a lot of space on your drives. But do not worry. Resizing photographs can be a simple task. You could learn How to resize photos in Photoshop without losing quality with a few simple steps.
Method 1: Using the image resizing menu
This technique is likely the easiest as you can rapidly customize your sizes before saving them straight as a JPG or PNG to your pc.
Step 1.
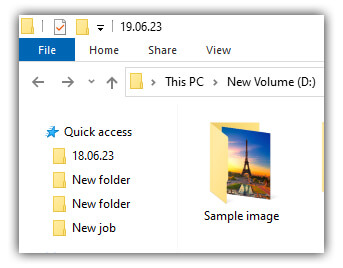
Open Photoshop & click File> Open. Then find your Image on your computer or Mac & click Open.
Step 2. Resize the Image

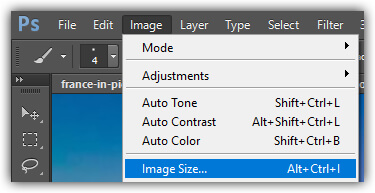
Click Image and then Image Size.
Step 3.
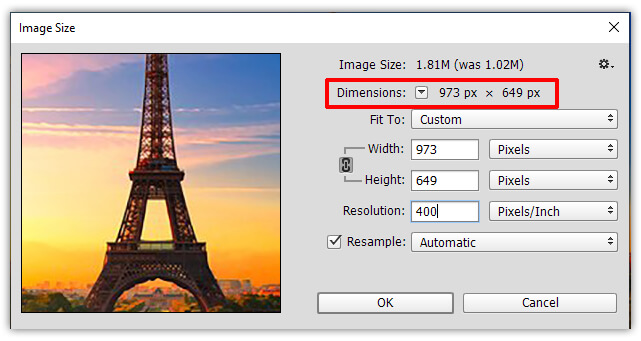
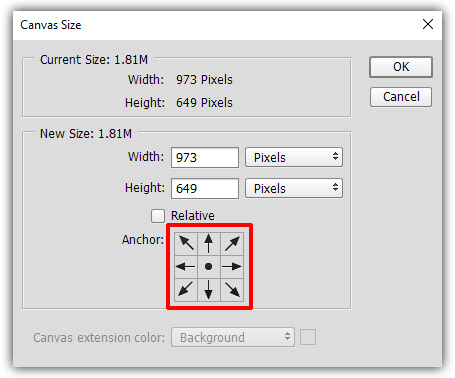
Clicking Image Size will open a new window that lists the Image’s Width and Height, along with its resolution in ppi (pixels per inch). Decide what metric you want to use to resize your picture.
Pixels are best for photographs destined for the web & social media.
Inches are generally best for pictures that will be printed.
When you have selected, click the dropdown boxes to the right of the width & height fields & select your measurement of choice.
Step 4.
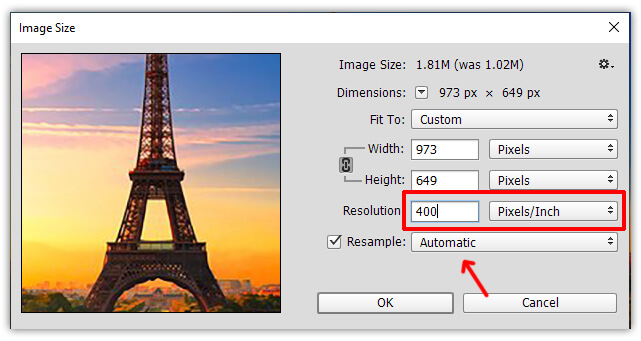
After choosing Pixels or Inches, Photoshop will display your photos present size using that metric. You can then change the width or height fields to your target size in Inches or Pixels.
While you change either Width or Height, the other will change automatically to maintain the current aspect ratio. Once you are happy with the altered size, click OK.
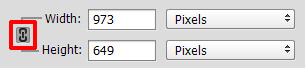
If you want to change the Width and Height separately, you can click the small chain link icon to the left of those two fields. It will let you change each individually. Yet, be aware this will distort your Image and generally is not advisable for most pictures.
Step 5. Save your picture
Save your picture by clicking File> Save a Copy. You can select the save location, name your File, & choose your format in the “Save as type” field.
The two most common file kinds are JPG and PNG. If you want to go back into your picture & edit it again later, we also recommend saving a separate PSD version.
Method 2: Resize Photos Using Smart Objects
Smart objects are a method of how to resize a layer in photoshop without losing quality. As they place your Image into a “container,” you only ever edit the container & not the actual Image.
So even if you were to scale up & down a layer over and over, you would maintain the same steady quality.
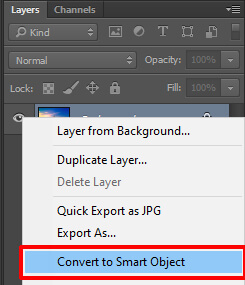
Step 1: Change the Layer into a Smart Object
Before you adjust your layer, you must convert it into a smart object. With your wanted layer selected, right-click and select Convert To Smart Object.
You will know a layer is a smart object from the smart object icon over your layer’s thumbnail.
Step 2: Resize the Layer with Transform Tool
To adjust your layer’s size, press Control + T with your smart object layer chosen.
Click on any corner of the transform box. You could scale your Image to fit your needs.
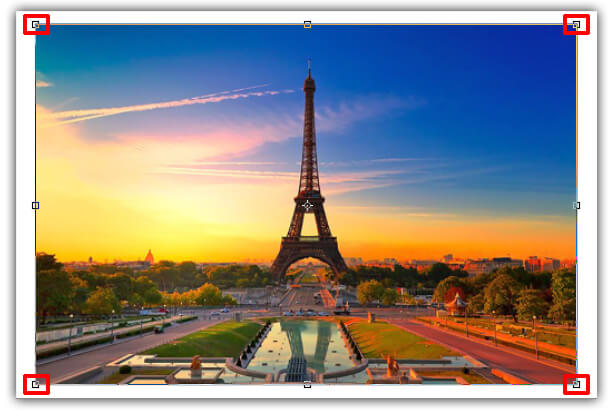
If you must move it into another document, select the Move Tool & drag and drop it into your other project.
You can rapidly make your photograph bigger or move it between projects with two simple steps. The only disadvantage to this method is that you cannot control the exact sizes of the photo.
However, if you are working on a canvas with specific image dimensions, using smart objects is an excellent method to make your photo fit. Best of all, it assurances you maintain the highest image quality; it does not matter how much you scale the layer.
Method 3: How to Resize an Image using Drag & Drop
This method is generally used when you wish only to resize some of the Image or canvas. In this case, you would only desire to resize the individual layer inside the canvas. If you want to quickly scale a image in Photoshop, this is a shortcut.
If you desire to use the Image Size option, all layers will be resized together. Here is how to resize a photo in Photoshop by dragging it to keep the canvas size unchanged:
Step 1: Select and unlock the image layer
It is essential if the selected layer you want to resize becomes a background or locked layer. Unlock it by going to the Layers Panel. Double-click on the background layer, or right-click & select Layer from Background.
Right-click on the background layer & select Layer from the Background
A New Layer dialogue box appears wherever you can change the name. Put in any name you wish, click the OK button, and press enter or return key.
Name your layer in the New Layer dialogue box.

You can unlock the layer by clicking on the lock icon on the right side of the layer’s thumbnail in the Layers Panel. When the lock icon vanishes, the image layer is set to be resized.
Click on the lock icon to unlock the background layer.
Step 2: Alter the image size
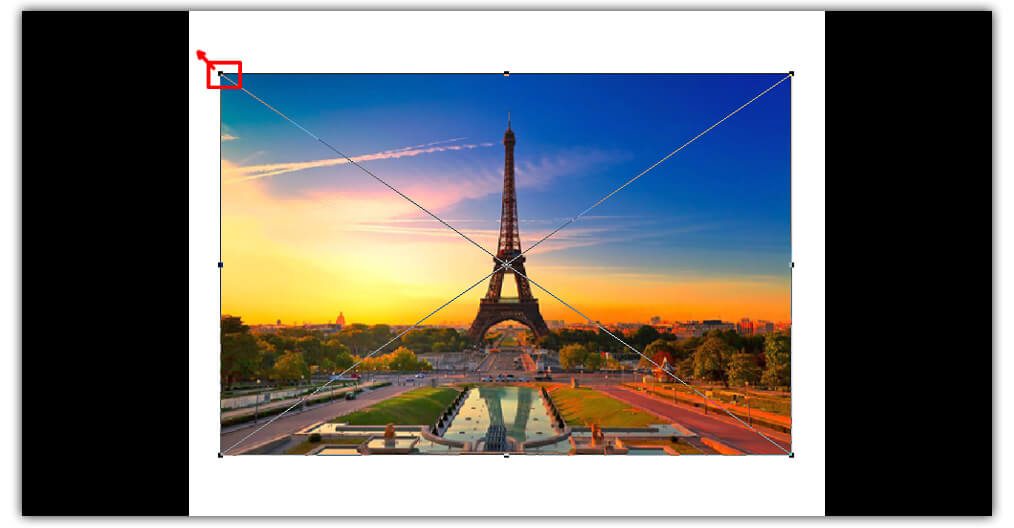
Next, choose the Move Tool from the Toolbar. After that, click on the layer to select it. You will see a bounding box adjoining the layer. If you do not, choose Show Transform Controls in the options bar below the top menu.
Check Show Transform Controls
Click & drag any corner handle or side handle on the bounding box toward resizing the layer.
If you want to resize your layer uniformly in the latest Photoshop version, there is no need to hold down the shift key when dragging the handle of the layer.
Step 3: Confirm to change in size
Once you have confirmed the new size of your layer, ensure it truly changes by double-clicking on the Image in the canvas. You could also press the enter or return key on the keyboard. Or click on the check mark (tick) key on the options bar under the top menu. it lets Photoshop know you want to commit to the transformation.
Click the checkmark to complete the procedure of resizing the Image.
Method 3: Using the Transform tool
When a picture is in a separate layer on top of a background layer, you could use the Transform tool (Control/Command-T) to perform a fast & dirty resize.
With the Transform tool active, move the mouse cursor to one of the corners of the chosen area, then click & drag the diagonal arrow to resize while preserving the aspect ratio.
If needed, click & drag the body of your picture to reposition it on your canvas.
Hit the Enter key to ensure changes or the Escape key to back out & try again.
Your final Image cannot be any bigger than your canvas, which you could scale via Image> Canvas Size. The leading cause to use the Transform technique is to crop & zoom a picture while keeping its borders in fixed dimensions.
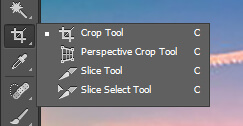
Method 4: How to Resize Photos Using Crop Tool
By its nature, the Crop tool abolishes the original Image while used to resize it. However, the picture’s quality may suffer because of the resizing.
After an image is cropped, the removed portions are no longer available.
Using the crop tool to minimize the Width or Height of an image is commended by cutting off unwanted sections.
Crop Images in Elements
To crop an image in Photoshop Elements, first, open the program & open the image file you wish to crop.
You should discover a vertical toolbar on the left-hand side of the program window.
Select the crop tool.
Settings should appear at the bottom of your window. You could adjust these settings for whatever sizes you want your photo to be.
In the “W:” and “H:” fields, you can specify the Width & the Height of the Image you want to crop it to. While the sizes are in inches by default, you can also type in other measures containing pixels. (In the dropdown, you also have the option to select No Restriction, which will allow you to crop free-hand.)
Then, hover your mouse over the picture, select the top-left corner from which your cropped Image will start, and expand the crop window to where you desire your Image will be cropped.
Hit the green checkmark to apply your crop settings. Be definite about saving your picture when you finish.
Resize Images in Elements
To resize a picture, open the Photoshop Elements program & open the image file you want to resize.
In your top menu bar, choose “Image”> “Resize”> “Image Size”.
A window will appear. Here, you can choose what you want the size of the picture to be under “Document Size”. Note that the proportions of your Image will stay the same; thus, when you change the Width, the Height will adjust appropriately. Hit OK when you have made your changes.
Your Image should be resized. Be sure to save your Image when you confirm the changes are applied.
FAQ
How do I compress an image in Photoshop without losing quality?
When you compress an image, some loss of quality is unavoidable. However, there are methods to minimize the lessening in image quality. To compress a picture in Photoshop,
- Open the Image you want to compress.
- Go to File> Export As
- In the Export As menu, select JPG as your File kind.
- Move the Quality slider to the left to lessen file size and quality.
- Click the blue Export Photo button and select where you want to save your compressed File.
Does resizing an image affect its quality?
It certainly can! Typically, making a picture smaller will not impact the quality, but an image can suffer quality loss when scaled outside its original size.
Why is it significant to resize images?
The most common cause for resizing photos is to decrease the size of big files to make them easy to email or share online. Dropping the size of an image discards pixels. Instead, creating an image bigger increases the number of pixels, which may result in losing quality.
Final Thoughts
When you resize a picture using Adobe Photoshop, you can take steps to confirm you preserve the original photograph’s quality. Most approaches to resizing images with Photoshop will result in some picture quality degradation. However, there are options, for example, smart objects and Bi-cubic interpolation that permit you to resize pictures in a way that preserves their quality.
Reducing an image size & enlarging an image need different approaches. Selecting the perfect method for resizing your pictures in Photoshop is critical to achieving the outcomes you desire. Knowing how to change an image’s size in Photoshop without losing quality will guarantee you always have the best quality pictures on hand for your work.