Change eye color in photoshop in Photoshop is one of the image manipulation effects. In this tutorial, how to change eye color in Photoshop with this handy guide! In just a few clicks you can turn dull eyes into vibrant ones, allowing you to put that unique touch on your design projects.
Change Eye Color?
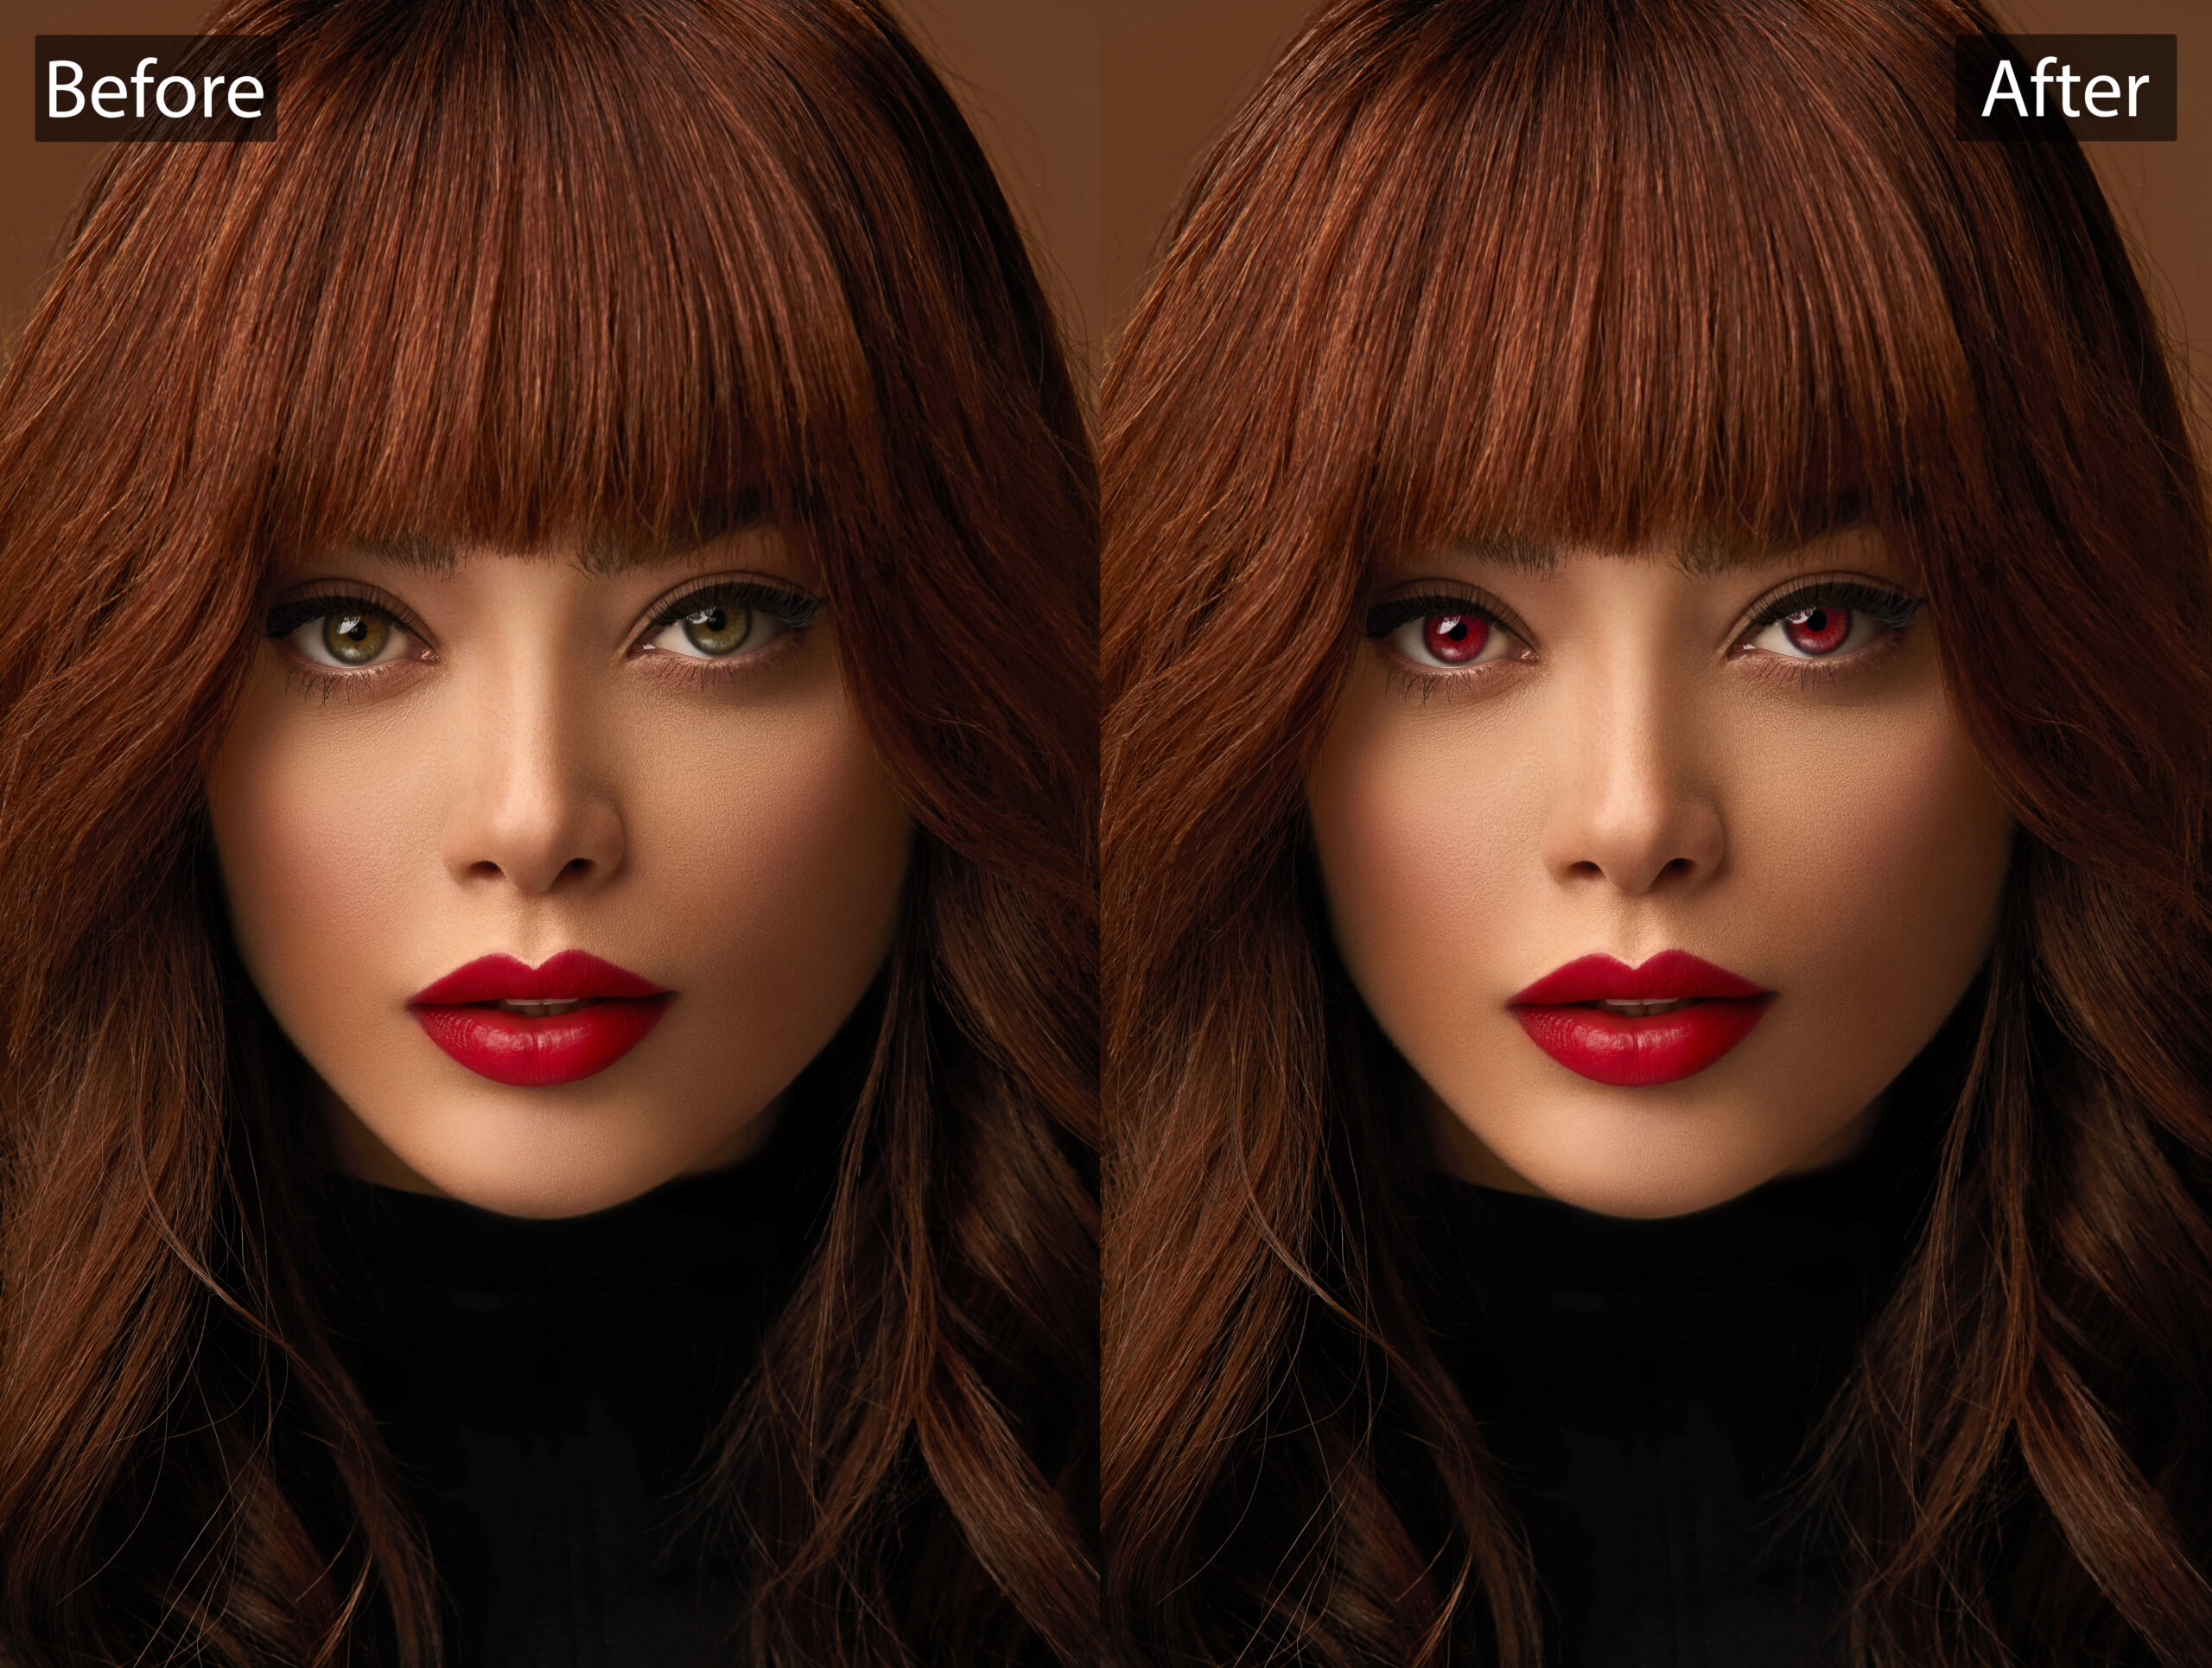
Artists change eye color in a photograph for several diverse causes. There might have been an unanticipated reflection that requires to be removed, or they might want to highlight small spots of the iris or even change the eye color entirely. These changes can be made for an artistic effect, for example wanting an orange or white eye to simulate a demon in the photograph. How to change eye color in photoshop
Why Photoshop?
Photos can be a lot of work to edit, and since storage is not usually much of an issue these days, it is best to just shoot in RAW format. This will permit you to always have the original photo on hand.
With so many photo editing tools on the web, it could be hard to keep track of them all. Some of the most popular are Photoshop and GIMP, and there are many others to select from, like PESs, Pixlr Editor, Fotor, and even apps for smartphones or pages that permit you to edit. The most complete editing software is Photoshop. Below we have discussed How to Change Eye Color in Photoshop in 2023.
Step 1 – Select the Area You Want to Recolor
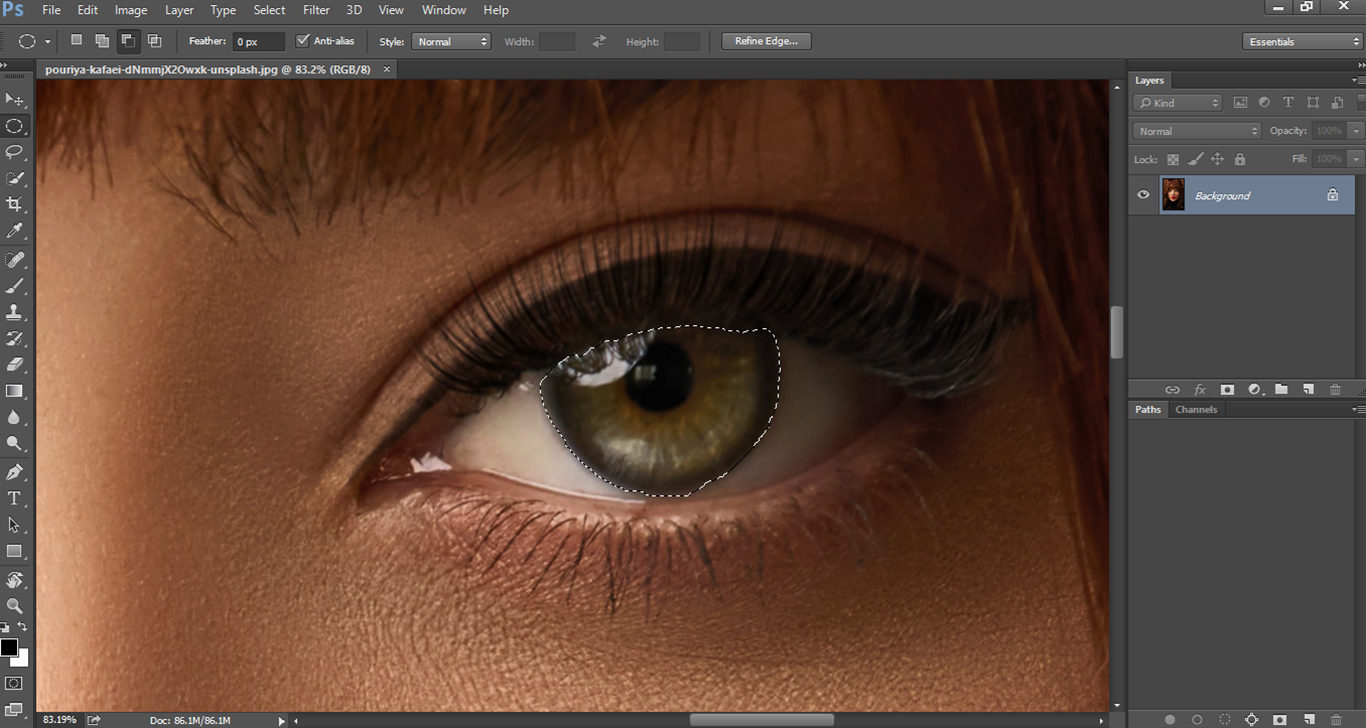
First, we need to make a selection that covers the iris and pupil as that is the portion of the eye we want to change color.
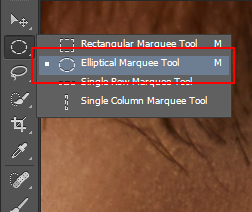
To do it, pick the Elliptical Marquee Tool (M) from the left toolbar.
Make a Circular Selection That Covers the Iris
To make a selection that starts from the center place your cursor inside the eye, then clicks and draw out to the edges of the iris while holding the Option/Alt key.
Make it as close to the form of the iris as possible, if it is not perfect since we are going to fix it later on.
Get Rid of Undesirable Portions of the Selection
We do not need the selection portion covering the eyelid plus lashes.
To get free of it, hold the Shift + Option/Alt keys while generating an oval shape that covers the part of the selection you want to keep. Your cursor must have a “+” on its lowest right side.
This way, the joint between the circular and oval selections will be kept, and undesirable areas not in the intersection will be eliminated.
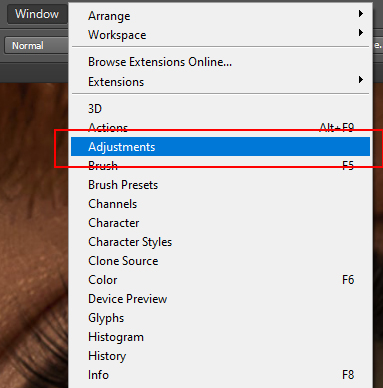
Step 2 – Generate a Hue/Saturation Adjustment Layer
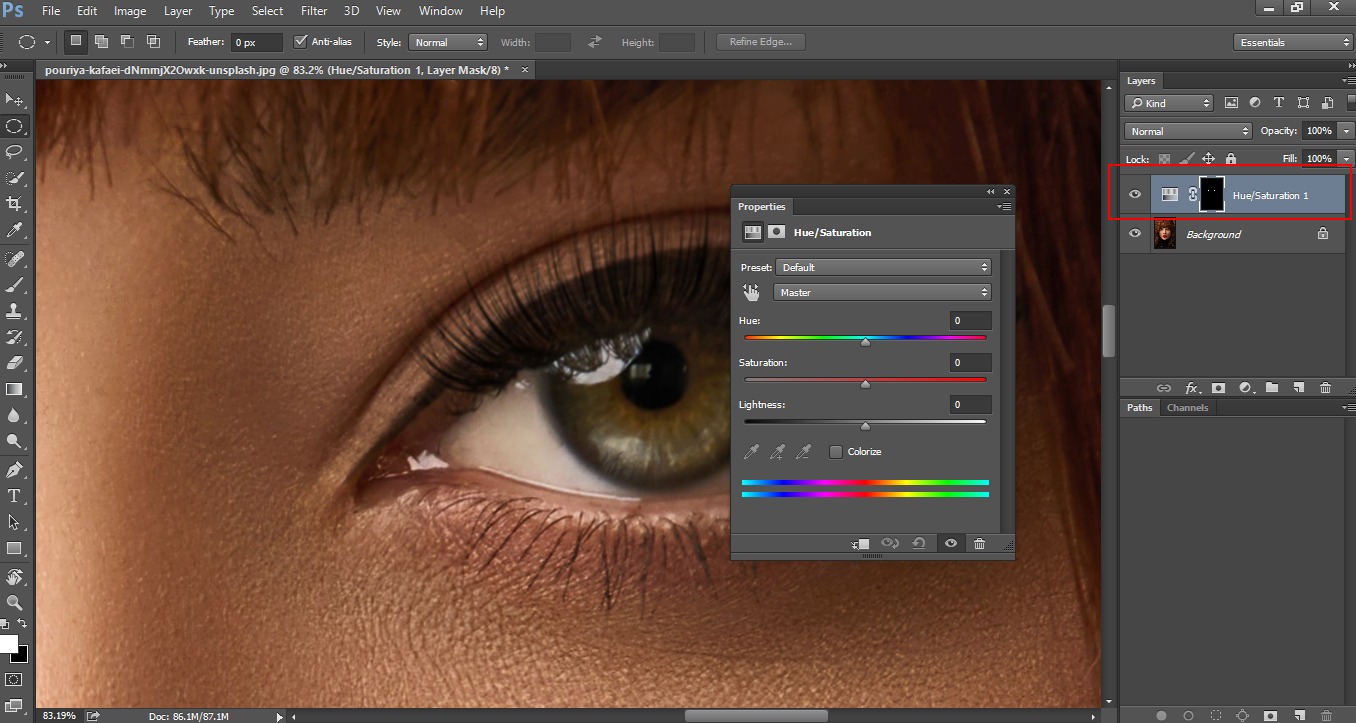
Without deselecting the iris, head to the Adjustments panel (Window > Adjustments) and generate a new Hue/Saturation Adjustment layer.
You will notice that your new layer has a mask, thus edits and adjustments will only affect your selected part.
Step 3 – Refine Your Selection
To ensure that we are only going to change the iris’ color and to help refine our selection if required, let’s head to the Properties panel and check the Colorize box. This would change the color of our selection and will make it easier to spot any details that need fixing.
Adjust the Mask Feather to Smooth Hard Edges
To smooth out the selection edges, ensure that your mask thumbnail is selected and click on the Masks icon in the Properties panel. Then, adjust the Feather value until you see that the edges are smooth and sufficient.
Hide Undesirable Colored Portions by Refining Your Mask
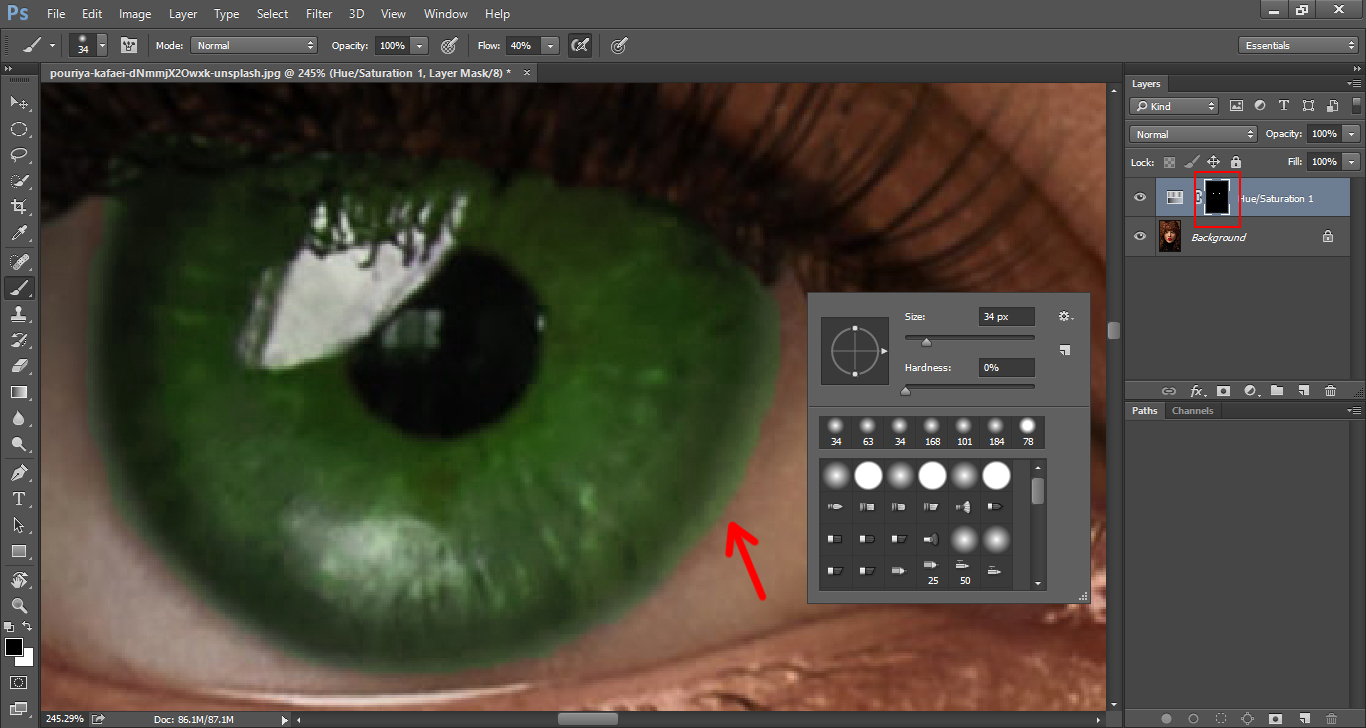
If you see color on parts of the eye that would not be colored, ensure that your mask thumbnail is selected in the Layers panel.
Then, use the Brush tool (B) with a soft brush (0% Hardness), making sure that black is set as the Forefront color to hide them.
If you made a blunder, just swap the foreground and background colors by clicking the X key, then use white to bring out what you want.
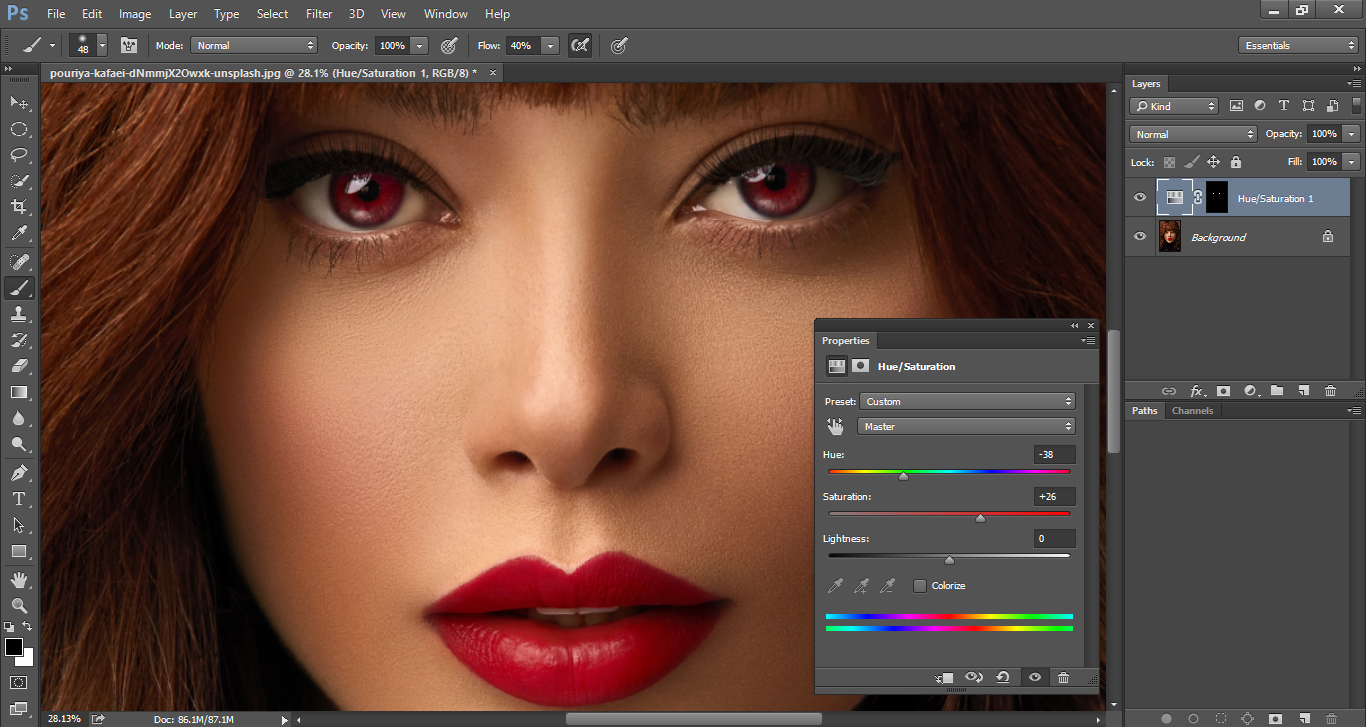
Step 4 – Change the Eye Color
Now, we are prepared to change eye color in photoshop. Experiment with the Hue and Saturation sliders in the Properties panel till you get the color you want.
Step 5 – Generate a Masked Group for the Adjustments Layers
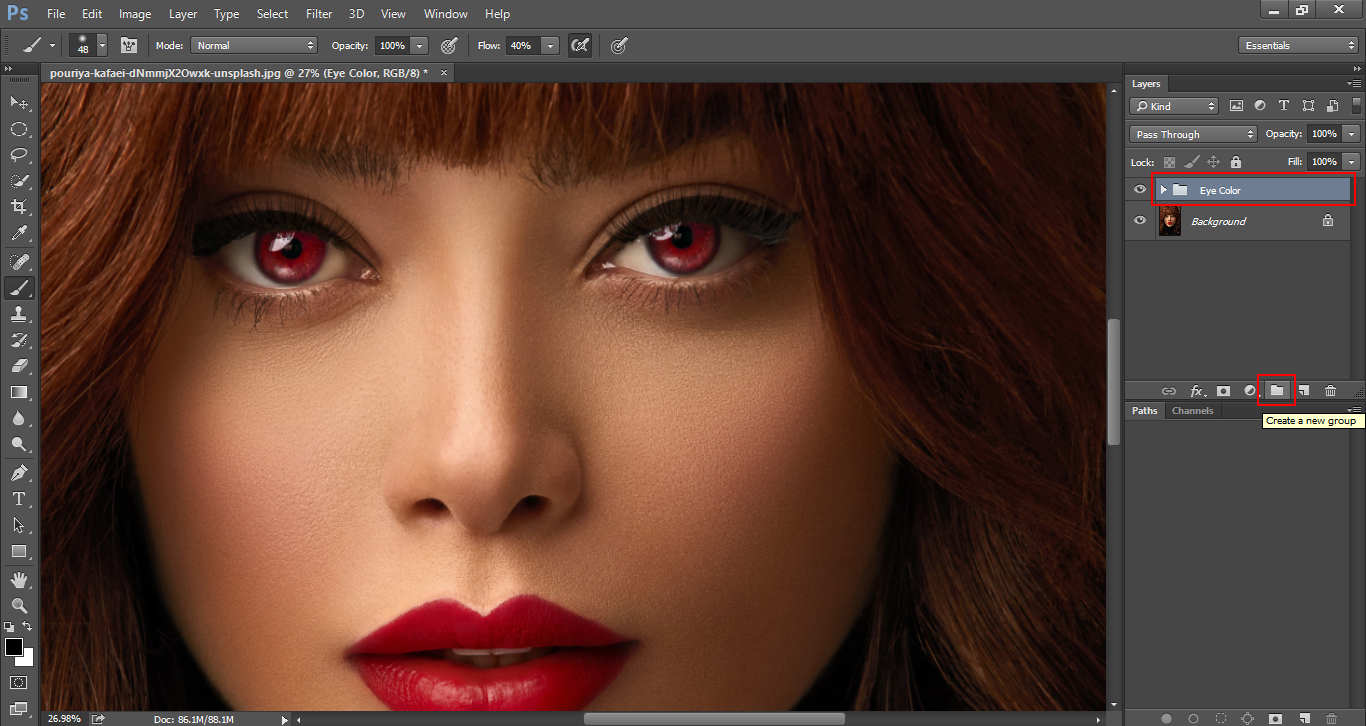
As we are going to add more layers to help provide the eye with a more accurate look, we want to keep all of those layers together and apply the mask to all of them. So let’s create a new group by clicking on the small folder icon at the lowest of the Layers panel, then name it Eye Color.
Next, drag the mask thumbnail on the topmost of the folder to apply the mask to it. This would separate the Hue/Saturation layer from the mask. Drag the Hue/Saturation layer onto the folder to move it inside. Now, everything you place inside the folder would be affected by the mask.
Step 6 – Add More Contrast with a Levels Adjustment Layer
You might notice that some parts of your eye, like the highlights and/or shadows, look a bit gloomy. To fix this, we are going to add a Levels Adjustment layer.
Ensure it is placed inside the Eye Color folder and on topmost of the Hue/Saturation layer. Then, move the black and white levers or select one of the presets to bring out your highlights and generate more contrast.
Step 7 – Enhance the Dark Areas
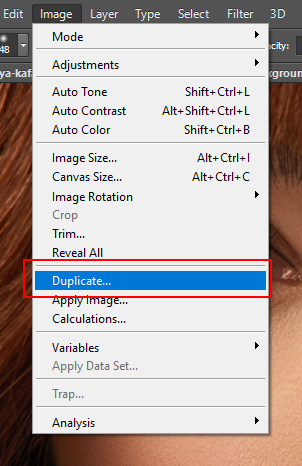
Duplicate the Background Layer
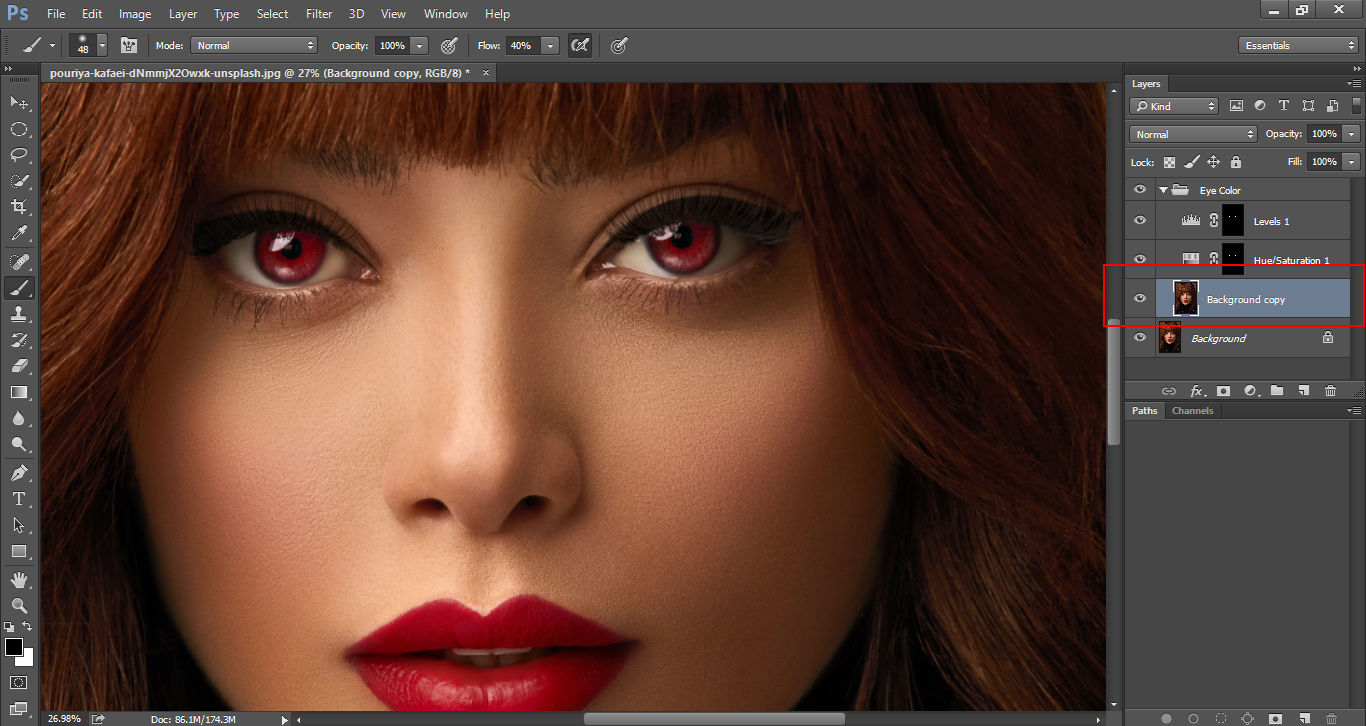
To improve the dark areas a bit, we are going to duplicate our background layer (Cmd/Ctrl + J) and rename the duplicate Eye 2.
Relocate the Duplicate and Change Its Blending Mode
Now, move the identical layer inside the Eye Color folder on topmost of everything and change its Blending Mode to Saturation.
Dependent on your image, you might need diverse blending modes and/or other settings to get the wanted results.
Step 8 – Change the Eye Color Again If Required
To change the color again, just select the Hue/Saturation layer and play around with the levers till you get the color you want.
Remember that you might need to adjust your other layers too to get better outcomes.
Tricks for Natural Eye Color Change
In reality, blue eyes take on a somewhat darker color at the edges. To copy this effect, use a curves adjustment layer so that you could change the eye color without being too obvious.
To start, add a Curves Adjustment Layer and make the middle of the layer darker. Invert and paint white around the edges of the layer to make it opaque. Afterward, lighten up the layer to generate a defined dark effect.
To generate the yellow dot in some blue eyes, first, generate an adjustment layer and set it to the blue channel. Pull down on the middle point to add a bit of yellow.
There is no perfect formula for this, so you will need to play around with it till you find something good! Play with the color channels till you discover a realistic-looking color, and place it in the middle of the eye.
As always, while working with layers for small parts, invert the layer and, using a soft brush, paint white near the middle of the pupil.
How to Darken Pupils in Photoshop
You can see reflections in somebody’s eyes—for example, the photographer or paintings and trees from hallways or outside can all reflect onto the subject’s retina. To correct this, you can use a layering system like the one below to darken the pupil and mask those reflective twinkles. You can also make the pupil brighter with a lighter color.
Always recall to keep focused on the eyes while shooting portraits: Ensure the lighting is constant and avoid any reflections, as this creates editing eye color much easier.
FAQ
How do I change the color of my eyes in Photoshop?
You can add contrast, sparkle, or even change the eye color entirely for an eerie effect. To do so, you will want to select the eye area with your Pen in Adobe Photoshop, and then add a hue adjustment layer. Play with the Color Slider till you have the tone you are looking for.
How do eyes change color in editing?
Go to the Beauty option as well as select the “Eye Tint” tool. Select the color your like, and adjust the brush size to fit your eyes. Use the brush to paint over the eyes in your photograph to change eye color in photoshop, and you can slide the slider to adjust the brush intensity as required.
How do you use the eye tool in Photoshop?
It is simple to use the tool as all you have to do is draw a box around the pupil to be fixed. It may take a few passes to change the color from red to black. A faster way to change the color of the pupil from red to black is to click straight on the red. That will change the color instantaneously.
Where is the eye tool in Photoshop?
Go to the left-hand side toolbar. Scroll down to the bottom of the “Spot Healing Brush Tool” menu to select the “Red Eye Tool”
Conclusion
So the next time you have a photo with red eyes, or perhaps you just want to find out how you would look with a different eye color, you could change it easily using this method with Photoshop. You can always get the best photo-editing assistance from a reputable company like Clipping Path Mania.