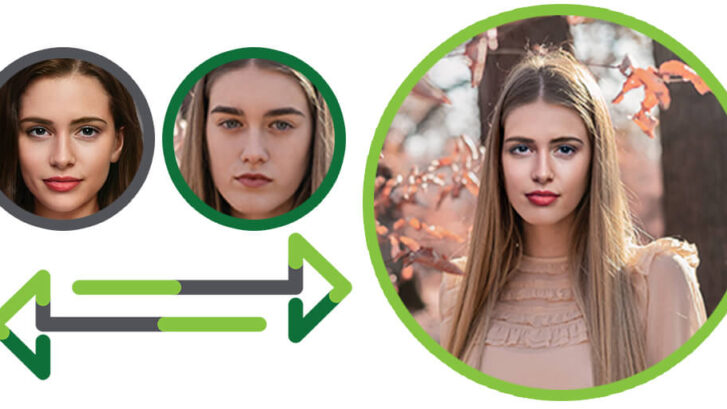
How to Swap Faces in Photoshop Step-by-Step Guidelines
Face swap is a fun activity you could do with an app on your phone. However, you can accomplish this with Adobe Photoshop for several applications.
Finally, this method is used by experts for more than just the face. Additionally, it is used to switch graphics and logos among various goods. The face swap Photoshop method helps swap the faces of diverse people. It is a valued tool for Ecommerce editing and brands that desire to get the most out of their investment in product photography.
This tutorial will show you the step-by-step procedure for this extensively used Photoshop face swap and blend method.
Why We Need To Swap Face
There are many causes people swap faces with Photoshop. Humor is one cause- facial recognition technology of face-swap apps does not differentiate, which provides a means for any practice you may desire.
Also, an image might need an additional variety, particularly in product photographs that feature models. The model’s face may not stand properly, or she may have an unhappy look.
Replace face in photoshop for such photographs would go a long way to increase your sales and entice clients. They are required to upsurge photo quality which accordingly attracts clients. It is a product photograph advertisement approach that is convenient.
How do you make a Face Swapping Photoshop?
Step 1: Open Pictures in Photoshop
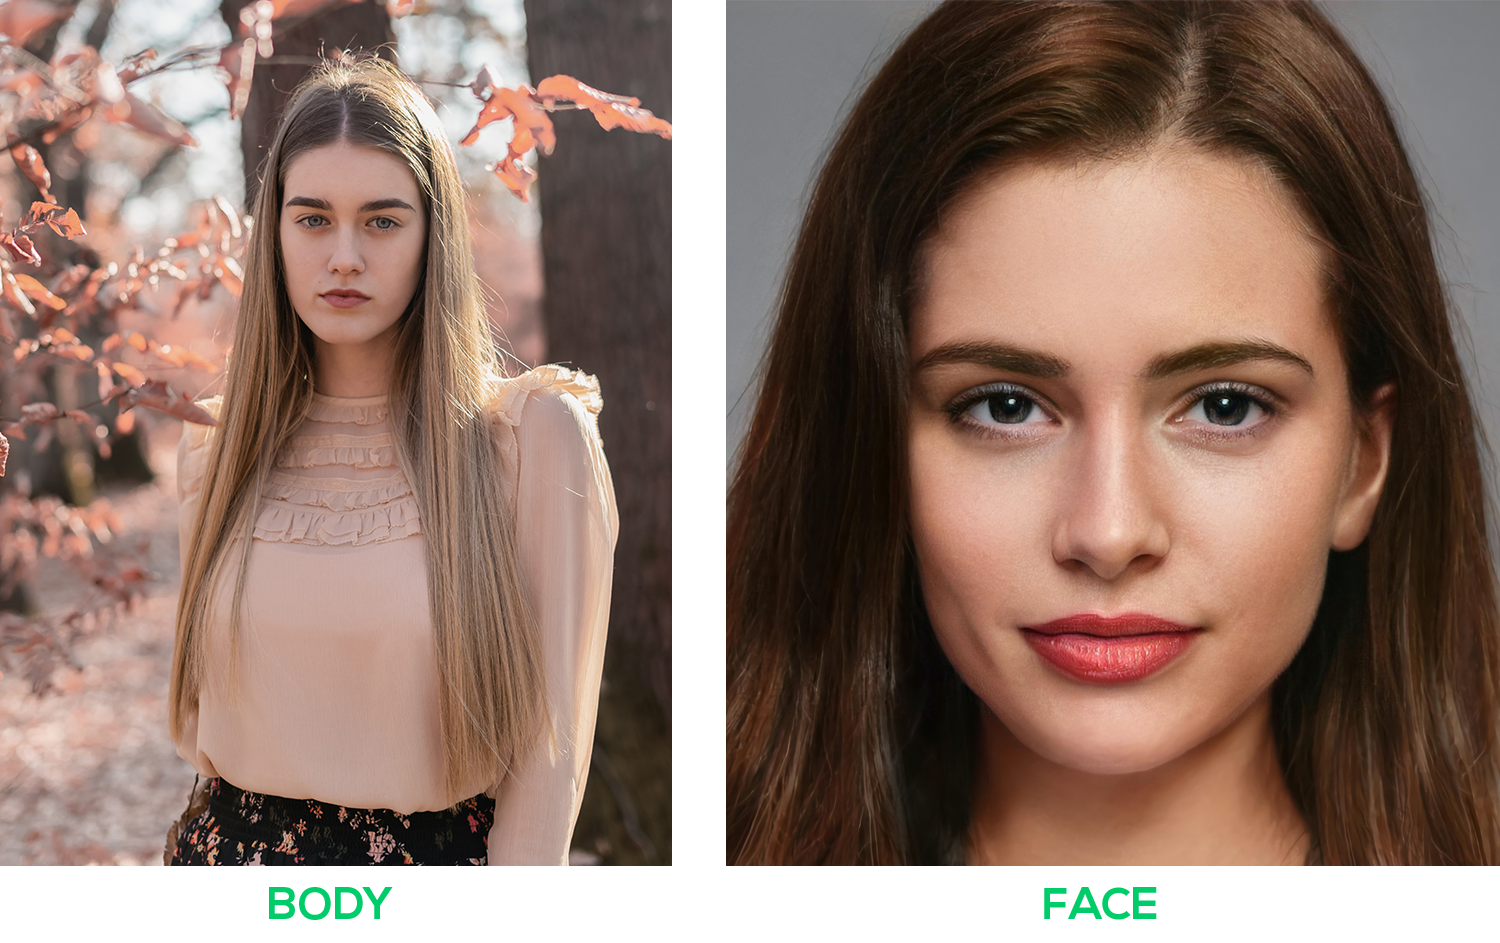
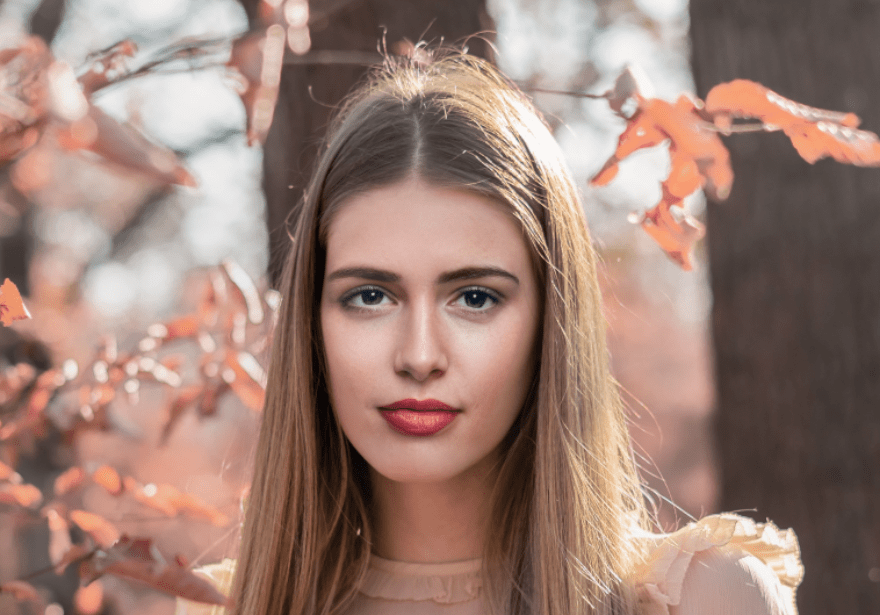
Open Photoshop and upload the two photographs that would be used for the face swap photoshop.
If you want to finish the procedure fast and with little trial and error, we commend using a photograph with the same face angle plus brightness.
Navigate to Files > Open. Open the pictures which you wish to do the face swap Photoshop.
If the images are in separate folders, you should open those individually; if the photos are in the same folder, choose those all, plus click Open.
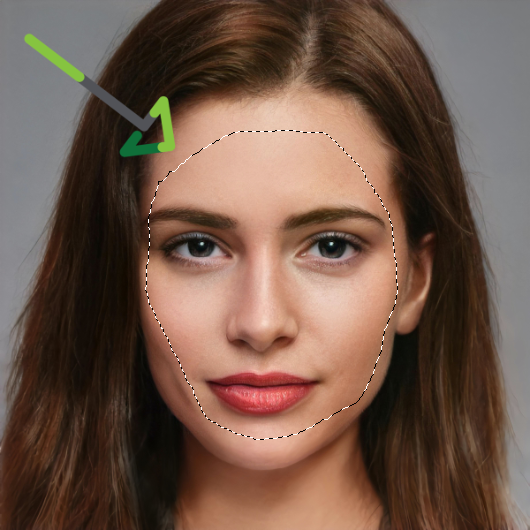
Step 2: Select the Face

You must first select the area where you want to apply changes. Select the image tab that comprises the face you wish to appear in the final picture.
To make a correct choice, press Z on the keyboard or choose the magnifier sign from the Tools menu to start Zoom. And click on face to zoom in.
Photoshop’s Tools panel on the left comprises a few Selecting tools, for example, the Lasso, Magnetic Lasso Tool, and Polygonal Lasso tool.

The Lasso tool chooses an area as you move the mouse while pressing, plus holding the left click. The Polygonal lasso, instead, is used to draw straight paths. Each click decides the angle of the preceding and succeeding selections.
A magnetic lasso is an edge recognition tool that helps identify difficult areas.
If you have stable hands, use the lasso tool; or the Magnetic Lasso or Polygonal lasso tool.
Remember that you could deselect the parts you have selected by accident. To deselect, choose a selection tool, hold Alt, and click the parts you want to deselect.
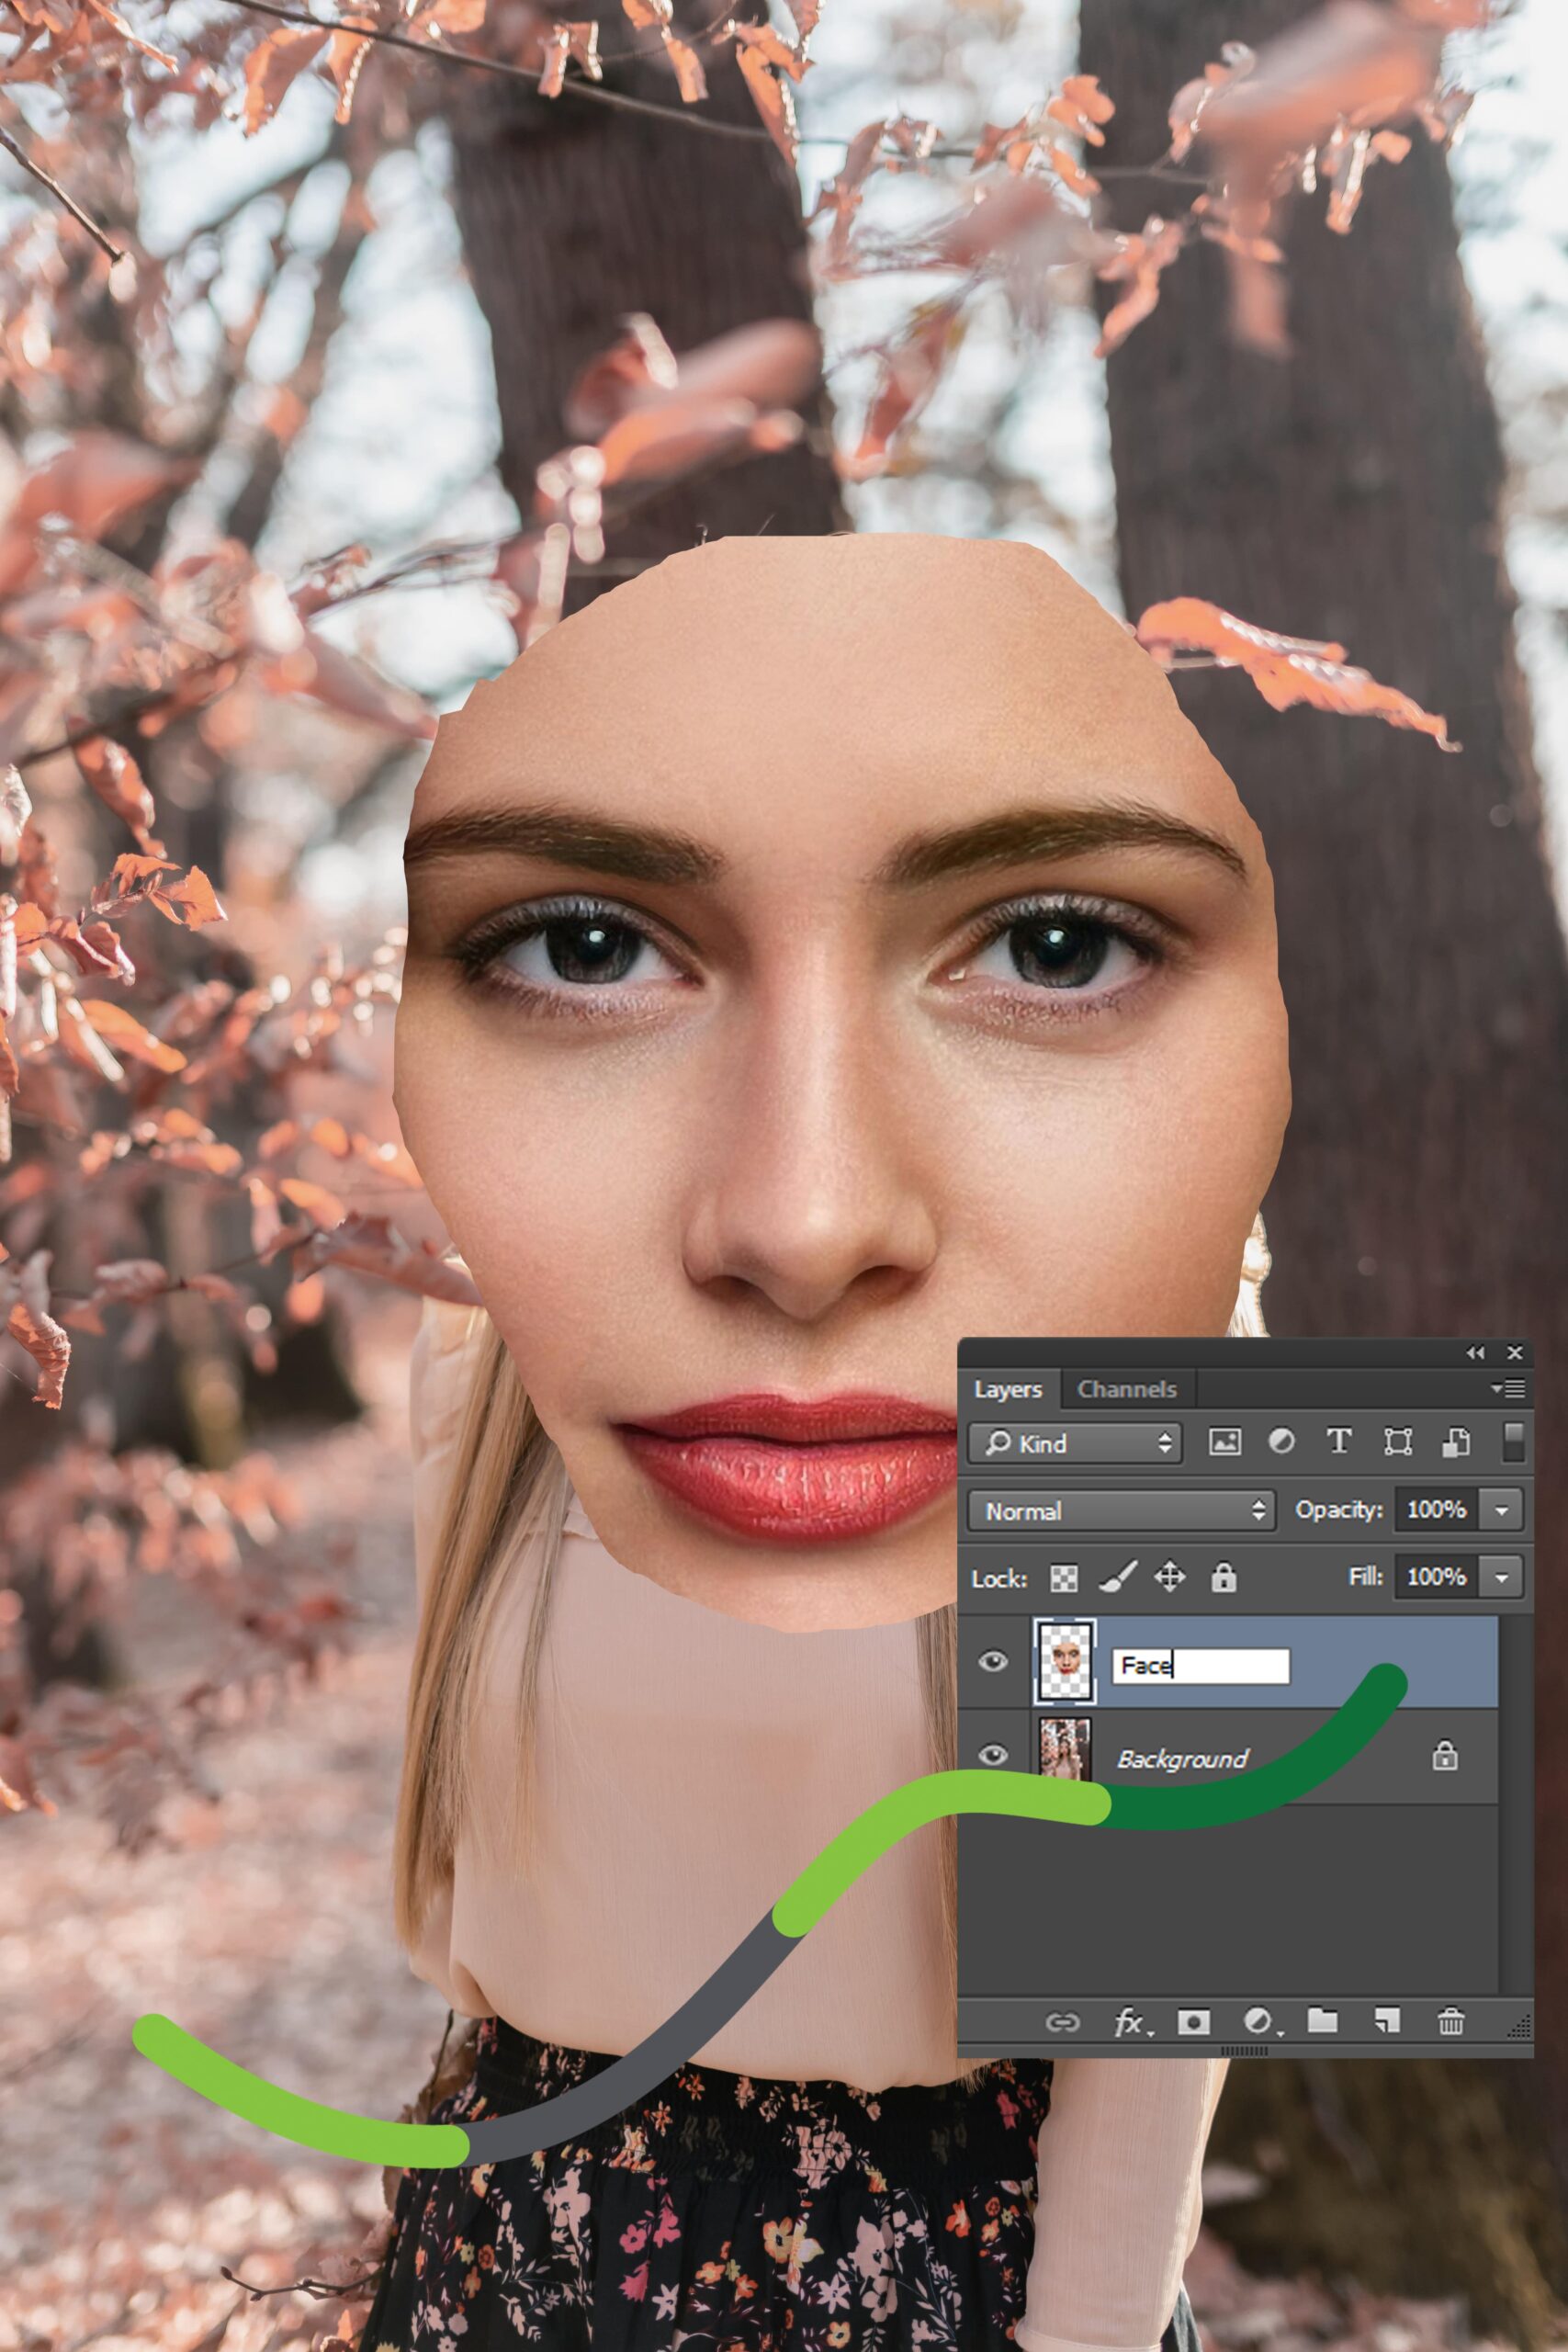
Step 3: Shift the Face to the Original Photo
You should see a dashed marquee line (known fondly as marching ants) around your selection. Choose CTRL+C (COMMAND+C on Mac) to copy the selection of the face. Alternatively, you can choose Edit > Copy from the dropdown menu at the top of the application window.
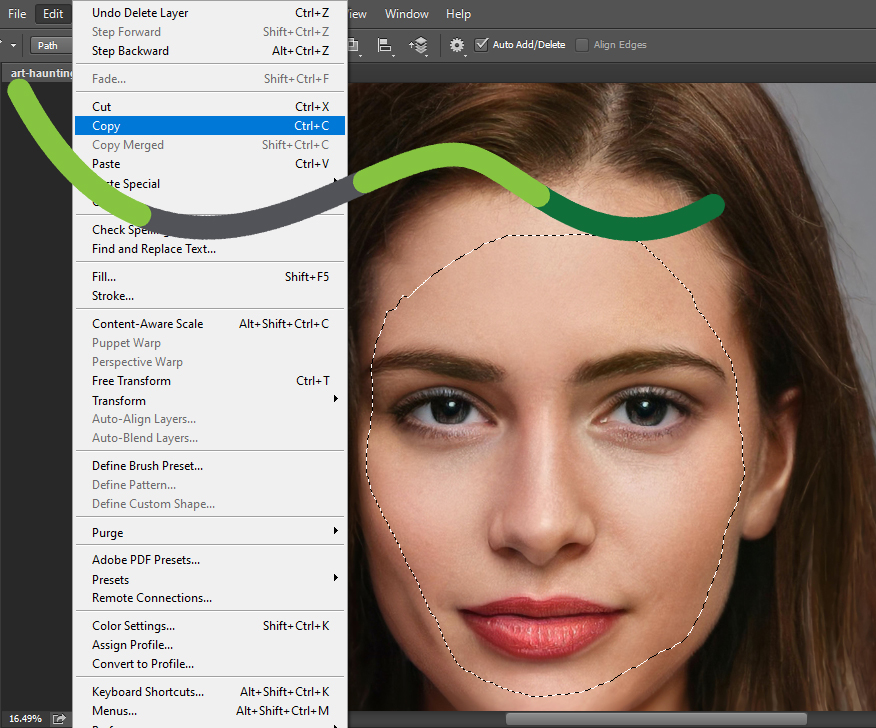
Next, we’ll move to the Body photo. In the Body photo, paste your selection from the other photo by typing CTRL+V (COMMAND+V on Mac) or choosing Edit > Paste from the dropdown menu.
Step 4: Resize the Face
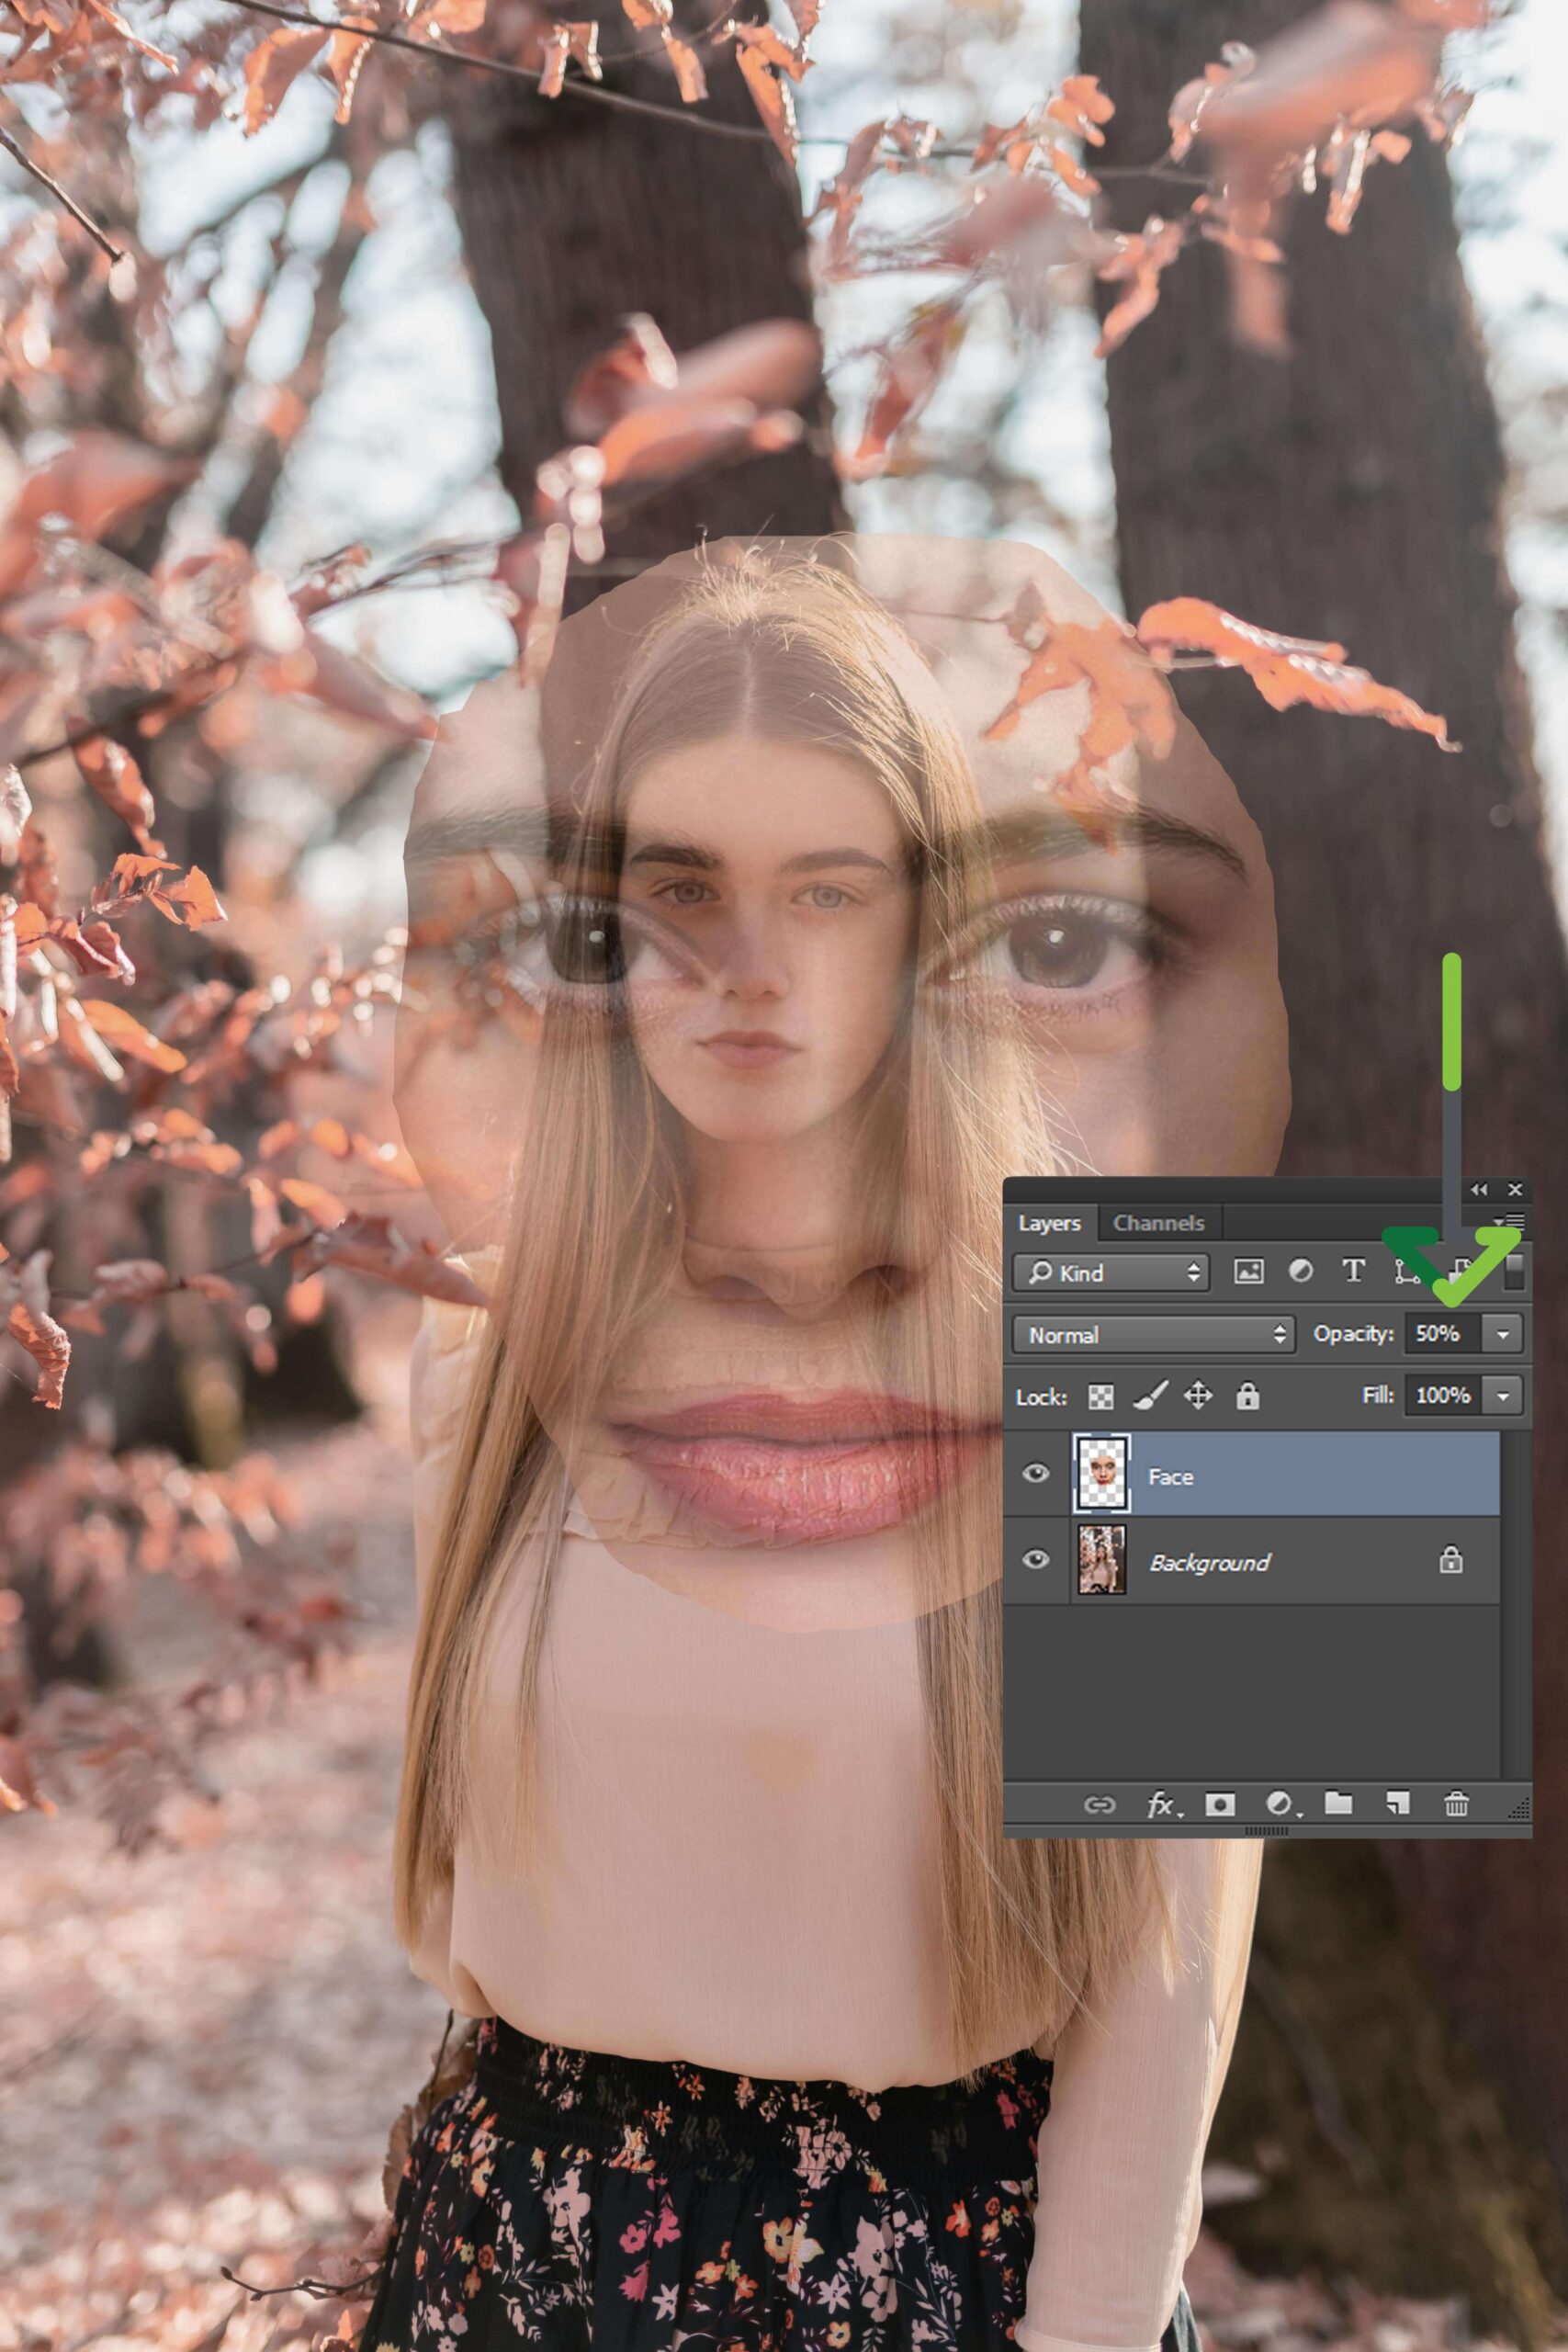
In this phase, you must line up the eyes, nose, plus mouth of the two faces. To start, decrease the opacity of the face layer by 50% to see the picture underneath.
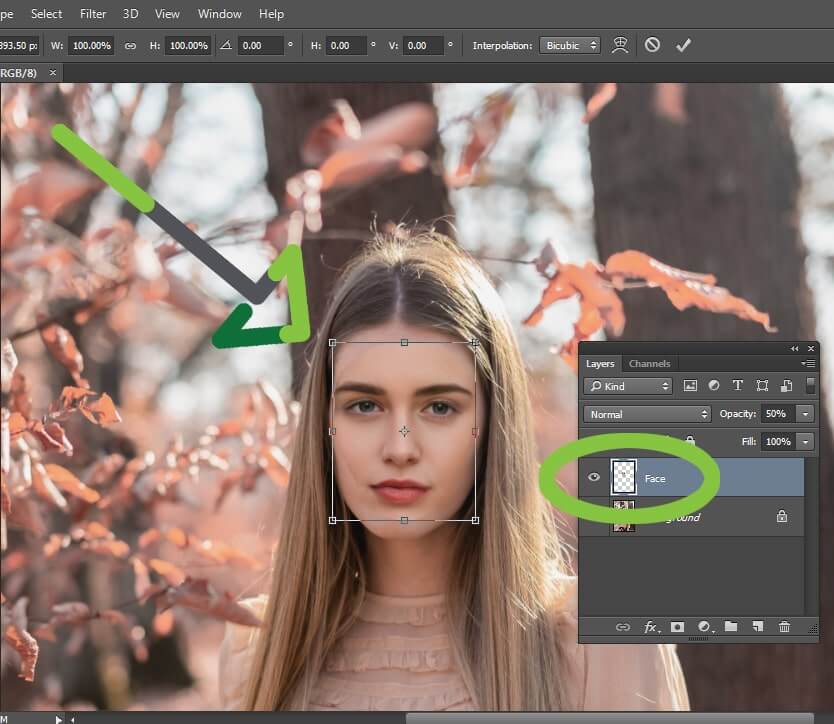
To permit resizing, select the face layer plus hit CTRL+T (Command+T on Mac). Pull the corners to resize the picture, then try to line up the nose, eyes, and mouth. To alter the angle, hit CTRL+T (Command+T on a Mac), then choose Rotate.
Next, reduce the opacity of this layer to 50%. You can now see the features of both faces to swap in Photoshop.
Please do not overdo it, as this could deform the face and make it seem unnatural. To achieve the finest result, hit CTRL+T (Command+T on Mac) and choose wrap again, then try to line up the chin and cheek.
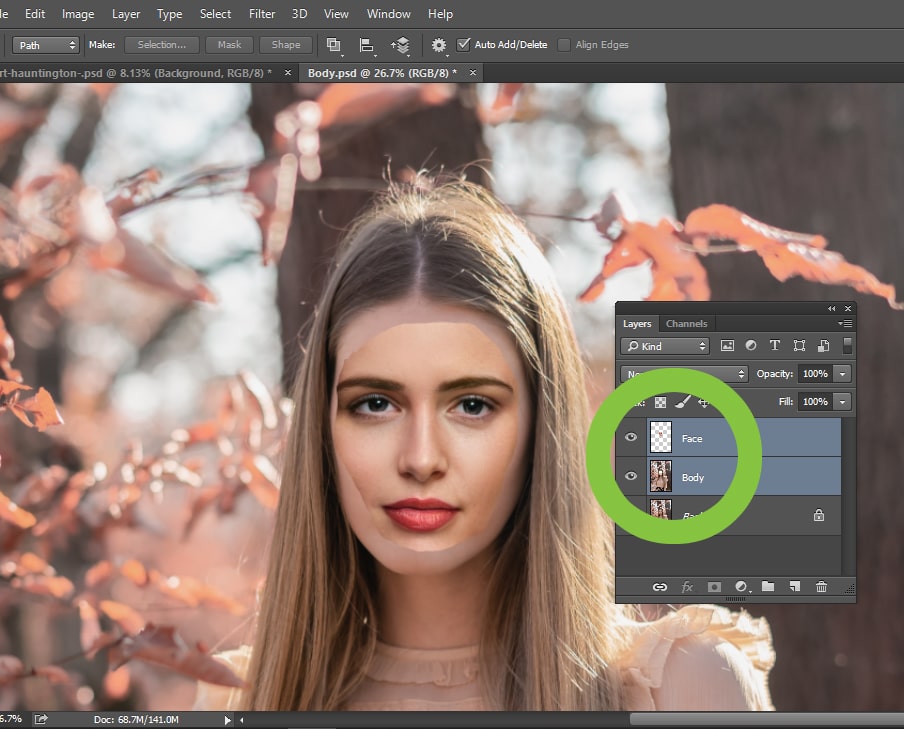
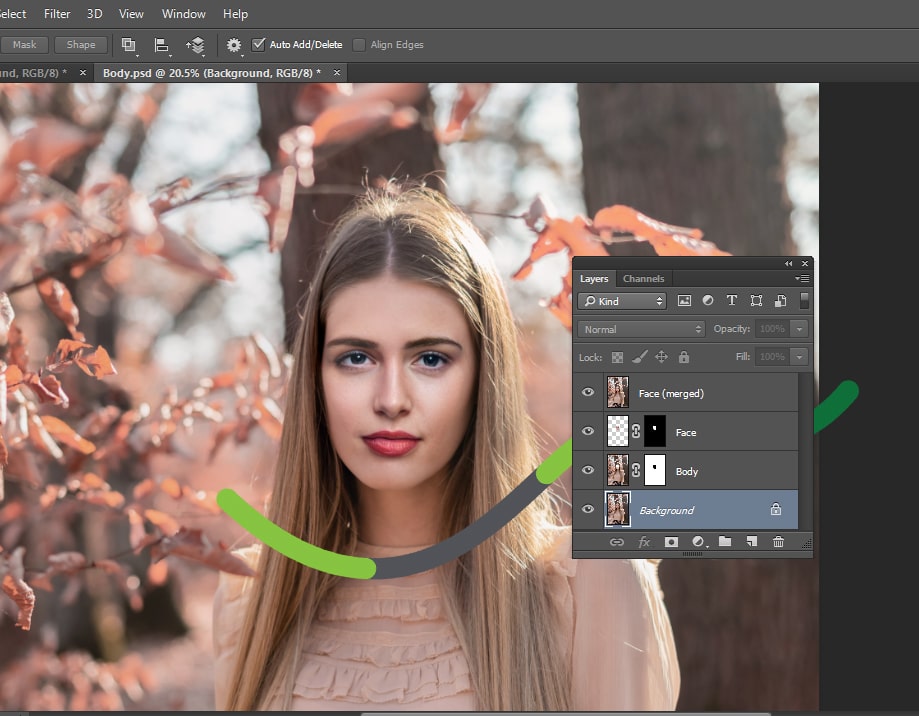
Step 5: Duplicate The Background Layer
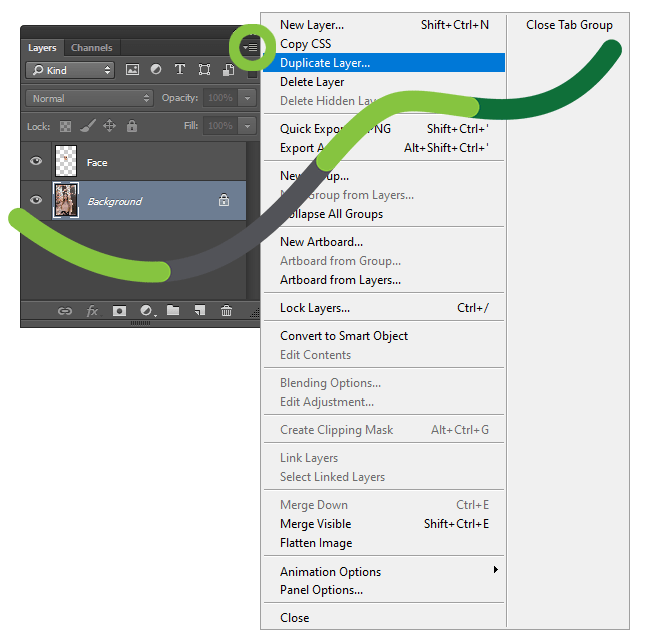
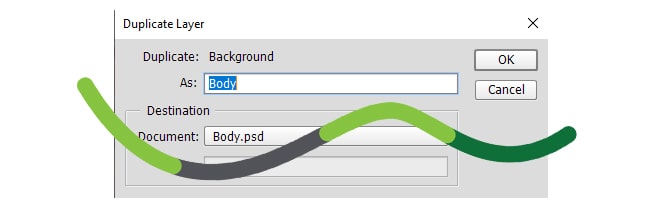
Before copying the background layer, tick the lock button to unlock it. While you open a layer, this is automatically retitled Layer 0. Then, right-click it and select duplicate. To avoid misperception, retitle the duplicated layer “Main” plus the face layer “face.” By ticking on the visible eye, you could conceal Layer 0.
It is time to restore the Face layer’s opacity to 100 percent. Afterward, we will choose the Face layer by holding Alt and clicking on the Face layer thumbnail.
Step 6: Make a selection in the Body layer
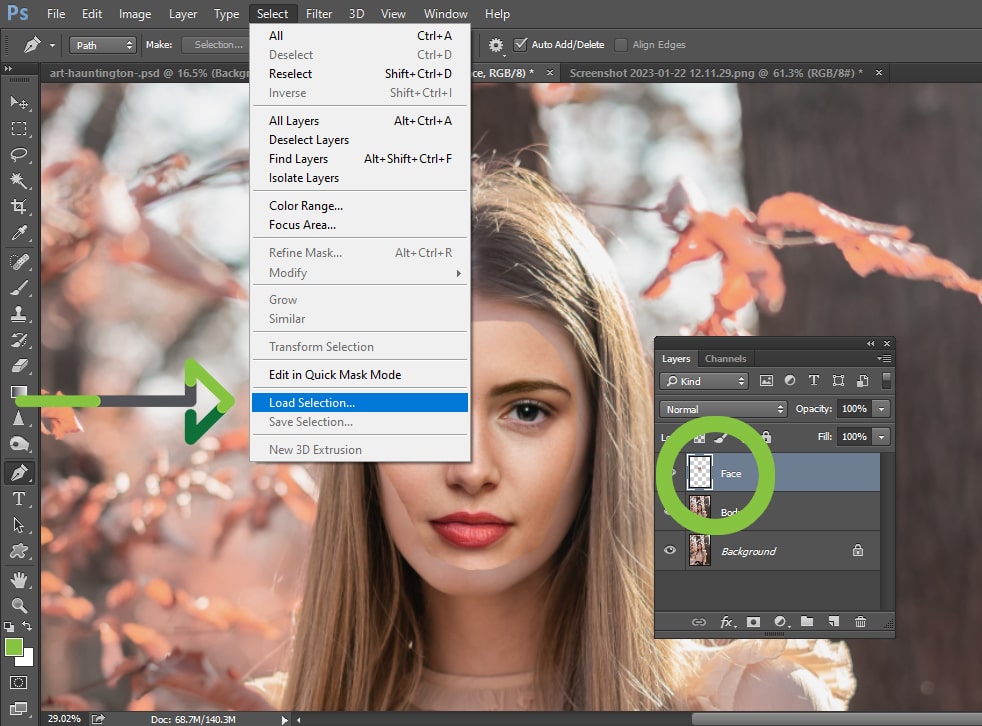
In the Layer panel, tick Face layer. At that time, select Load Selection from the drop-down menu at the top of the screen.
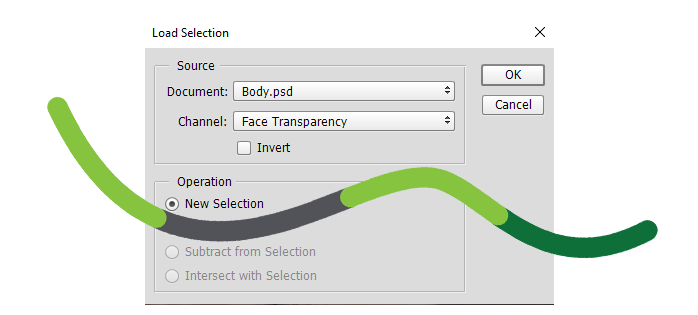
A pop-up window will appear. In it, the Channel would say, “Face transparency.” Underneath Channel, confirm the box next to Invert is unchecked.
The radio button next to “New Selection” must be selected.
Select OK.
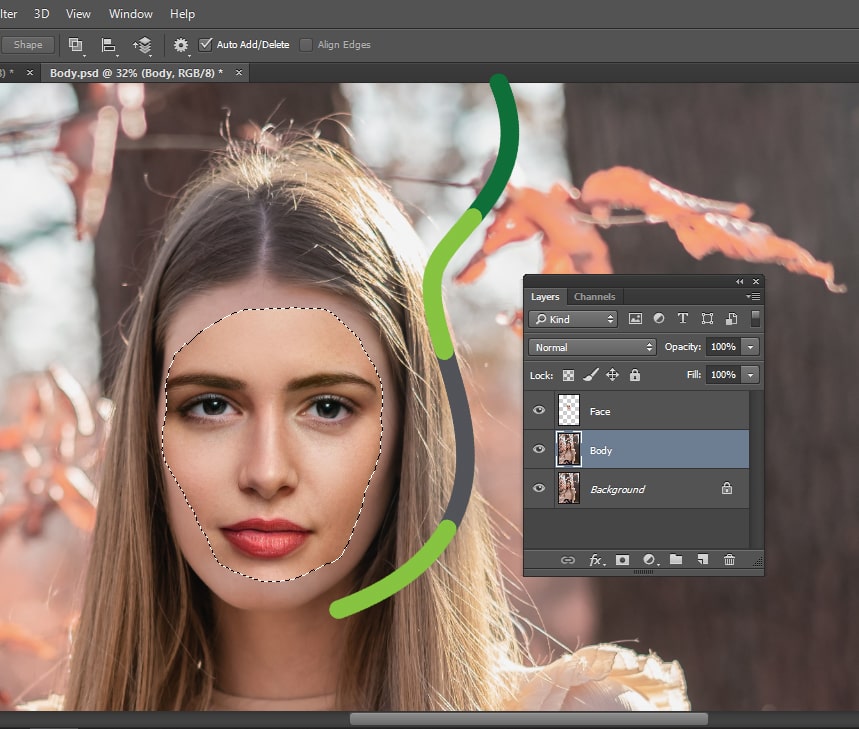
Back in the Layer panel, click on the eye icon beside the Face layer to make the new face invisible. DO NOT deselect your selection, however. We will be using that selection in the next step.
Step 7: Make a Slight Overlap between The Face And Main Layer
Navigate to the Select menu on the topmost of Photoshop and choose Modify, then Contract.
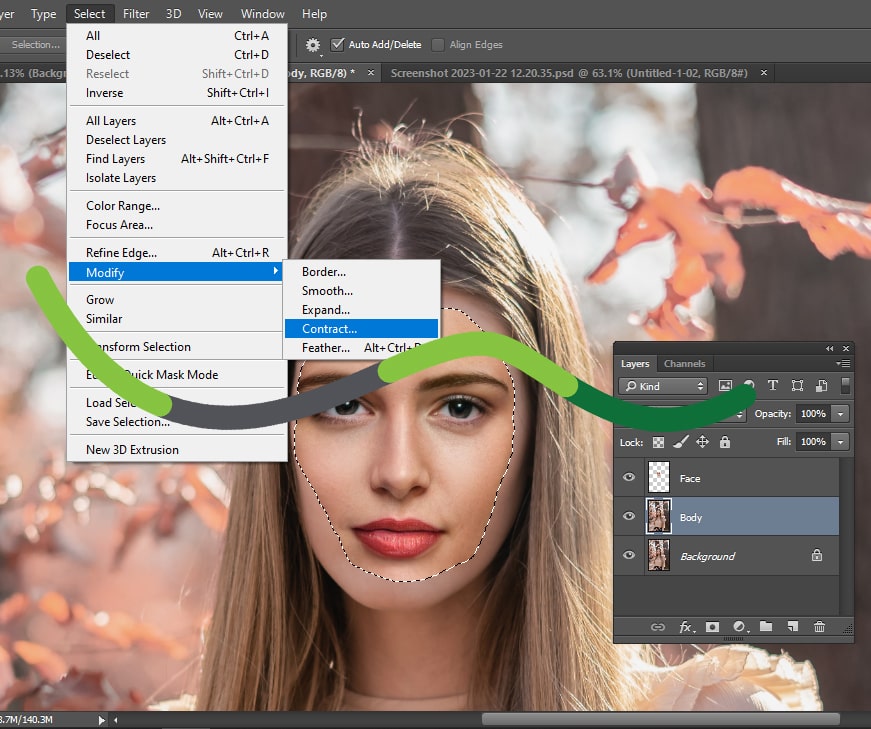
The perfect number for Contract Selection is between 8 and 12.
![]()
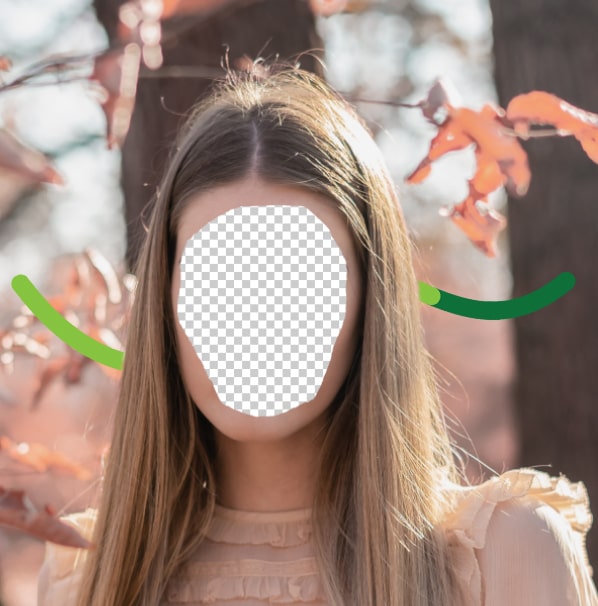
Step 8: Delete the Face On The Main Layer
We should eliminate the face from the Main layer beforehand, merging and blending it with the Face layer. To achieve this, click the Face layers visible eye while the selection is active to make this vanish.
Now, choose the Main layer plus use the backspace or Delete key to erase it.
Before continue to the next stage, recall to re-visit the Face layer.
Step 9: Blending the Layers To Change The Skin Color More Naturally
The face swap in pictures looks unnatural due to the variance in skin tone color and lighting effect on the skin. The best skin color tone among the two layers is challenging to achieve. Adjusting the skin color of both pictures with Hue, Saturation, Brightness, as well as a Layer Mask will take some time.
In a matter of seconds, Photoshop’s Auto-Blend Layers function could do it for you more naturally.
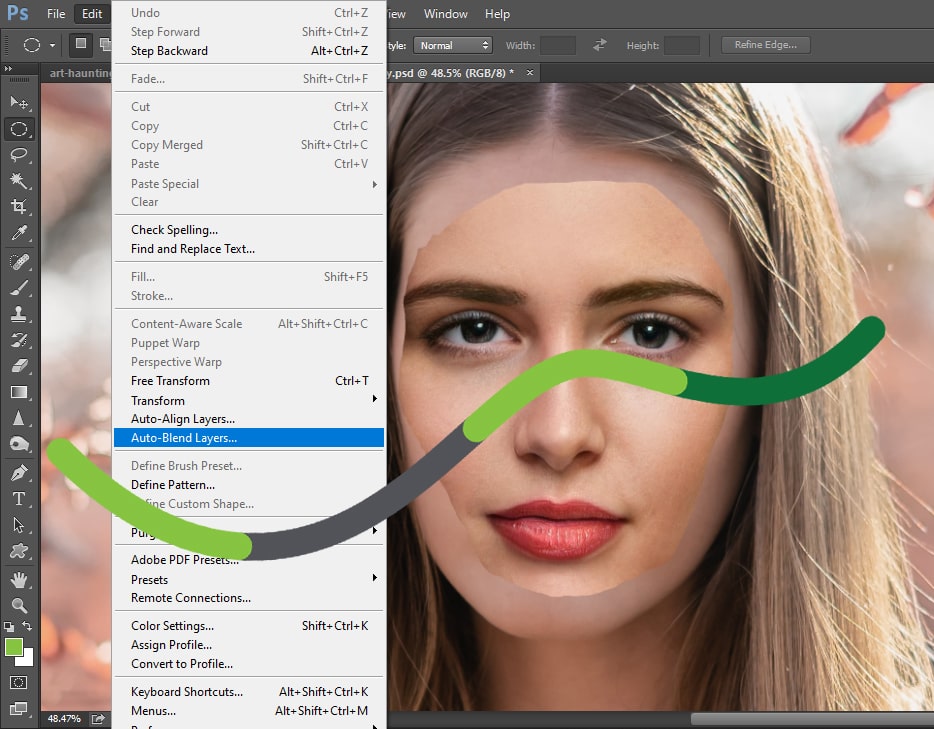
This option is accessible from the Edit drop-down menu. Choose Panorama in the Auto-Blend layers box, then check Seamless Tones and Colors — and Content-Aware Fill Transparent Areas.
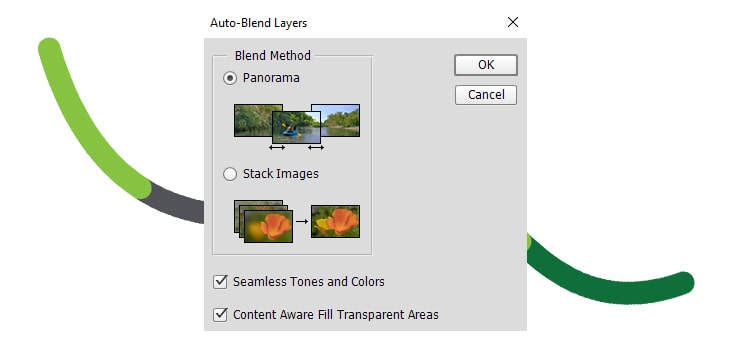
You will see the ultimate result afterward in a few seconds.
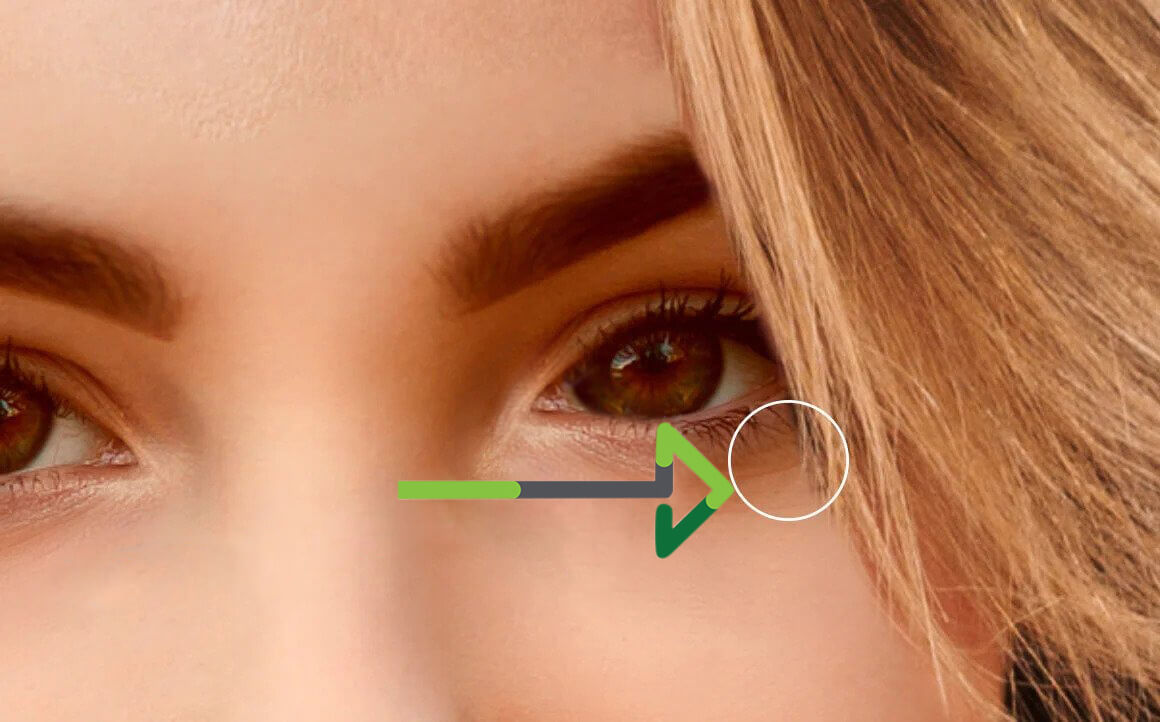
Step 10: Perform touch-ups (if necessary)
You may be done at this point! But in some cases, the original model’s hair might be covered up by the face of the new model.
To fix this and similar problems, exchange the visibility of the initial layer back on by choosing the eye icon beside the Background layer.
Then, exchange the visibility of any layers existing among the new merged layer and the original background layer.
In your new, merged layer, choose the Eraser tool.
Carefully erase any parts of the new model’s face to disclose the original layer underneath. Work cautiously, and use a small brush with 0% hardness for best results. Once you are satisfied with the results, remember to save your Image.
To save the Image, go to the Layers menu, select Flatten Image, and then save it.
FAQ
How do you change the swap face without Photoshop?
All you require is a good photo editor similar to GIMP or Paint. NET. Several web-based tools similar to Fotor and PicMonkey could be used for face swap. The procedure of face swap in Photoshop is not just restricted to two faces. You can put your face on any of the body when you have a good-quality photograph of yourself.
How much does it charge to face swap online services?
The charge of face swap online services depends on stuff like the kind of Image you want editing, the number of editing and fixes one has to do, etc. Though, if you know how to swap face in Photoshop, you can do fine without spending money.
How do I edit an existing shape in Photoshop?
Click the shape you want to convert, and then drag an anchor to change the shape. Select the shape you want to change, select Image> Transform Shape, and then select a transformation command.
How do I swap closed eyes in Photoshop?
Choose the Eye tool and select the Open Closed Eyes key in the Tool Options bar. Choose Enhance > Open Closed Eyes.
How do you alter eye color on Photoshop?
You can add contrast, sparkle, or even change the eye color totally for an eerie effect. To do so, you will want to choose the eye region with your Pen in Adobe Photoshop. And then add a hue adjustment layer. Play with the Color Slider till you have the tone you are looking for.
Final Words
Learning how to swap faces in Photoshop could be difficult if you are a novice. But with practice, you could improve your editing skill and experiment with challenging photographs. Yes, you could use new apps to swap faces instantaneously without giving much effort. But editing the photo yourself with Photoshop leaves a unique and professional feeling and makes it looks more realistic. You can always get the best photo-editing assistance from a reputable company like Clipping Path Mania.